This site runs ads and generates income from affiliate links. Read my disclosure policy.
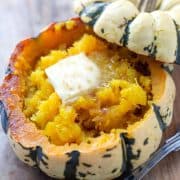
This Showstopper Roasted Squash recipe brings all the joy of fall to your table. Buttery sweet mash served in its shell to wow your guests.
Serve alongside roasted green beans and honey and maple roasted parsnips for the perfect sides to any holiday meal.
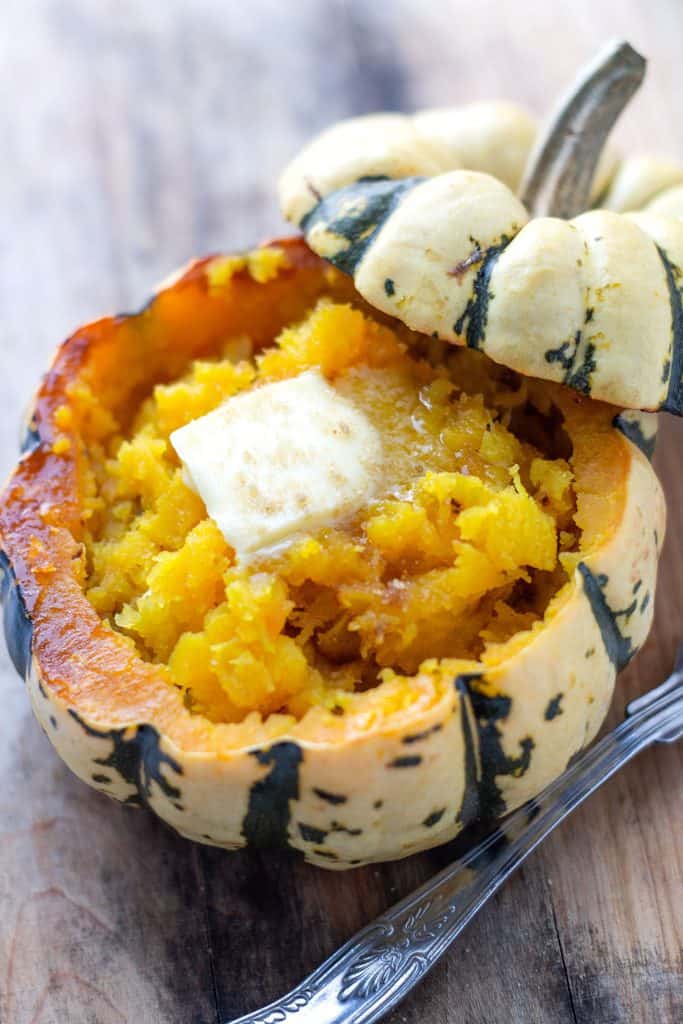
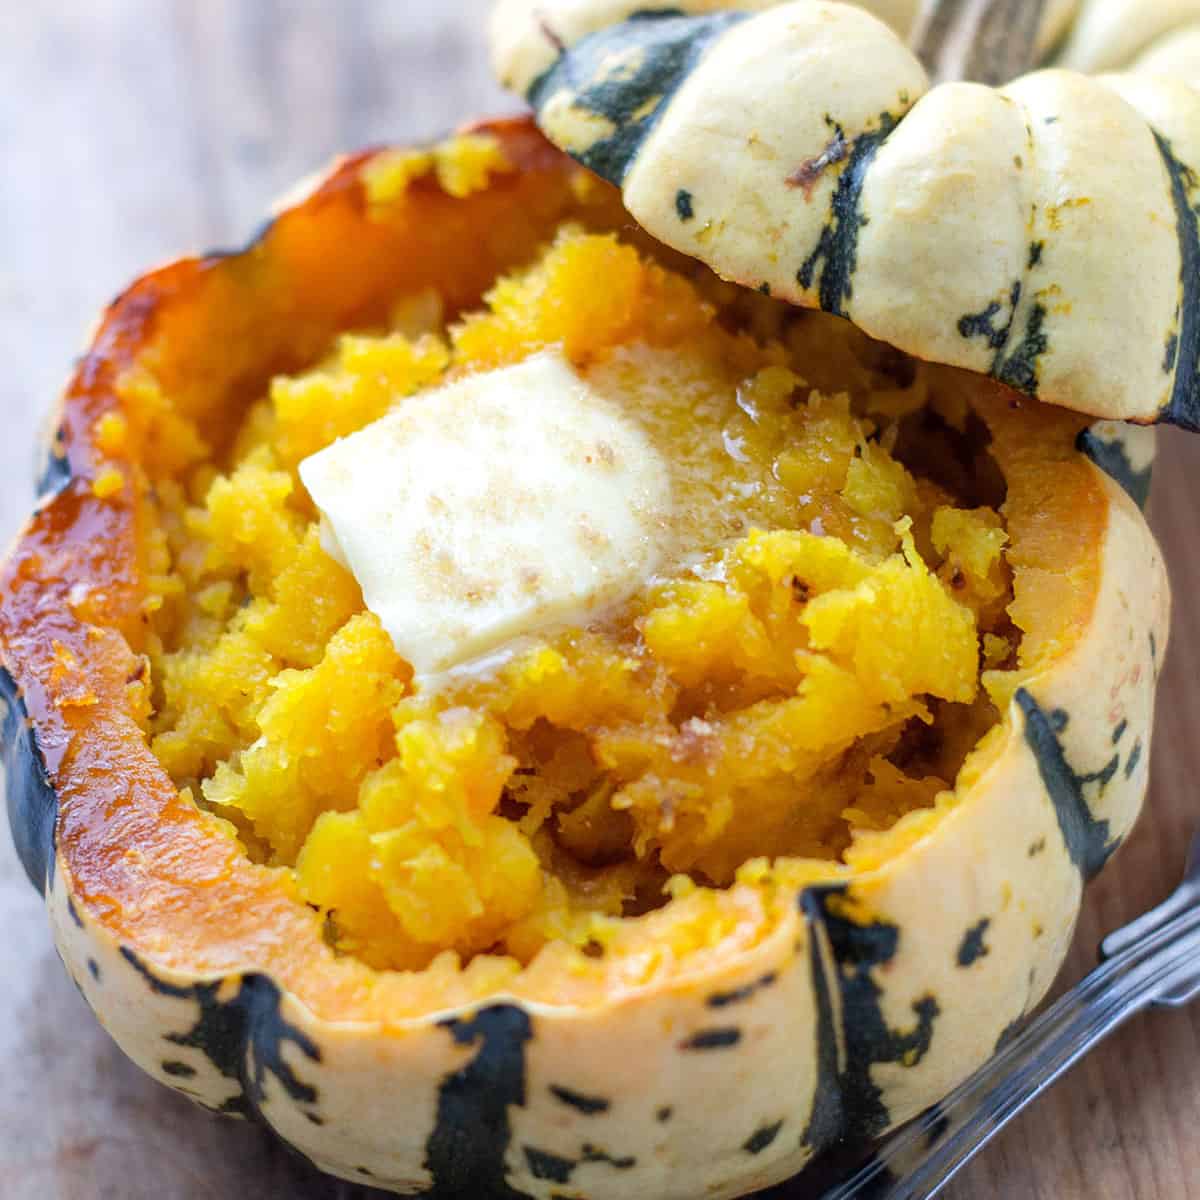
Oven roasted squash is really easy to make, and serving it in its shell (with its own handy lid) keeps it warm until you are ready to eat! It’s the perfect side dish for any holiday table or Sunday roast.
Why This Recipe Works
- Using brown sugar helps bring out the natural sweetness of the squash.
- Adding Butter gives the mash a creamy consistency as well as a buttery flavor.
- Serving the squash in its shell helps keep the dish warm before serving and makes a showstopping centerpiece to add to your dinner table.
- A little salt and pepper cut the sweetness giving a perfect balance.
What Squash Is Best
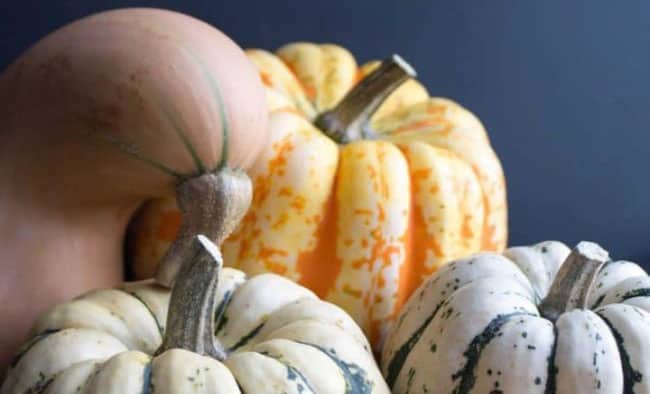
For this recipe, I used dumpling squash, but you can use any pumpkin or similarly shaped squash that you like to cook with such as Kabocha, Buttercup, or Acorn squash (you may have to trim the bottom to have it stand upright).
As you’ll need to make extra to fill the shells, butternut squash is a great addition to whatever squash you’re filling.
Mashed Butternut Squash
This recipe doesn’t have to be made using the shells. You can make it using cubed butternut squash that you roast and then mash in a bowl with the butter and brown sugar before serving as a side-dish.
How To Make Mashed Roasted Squash
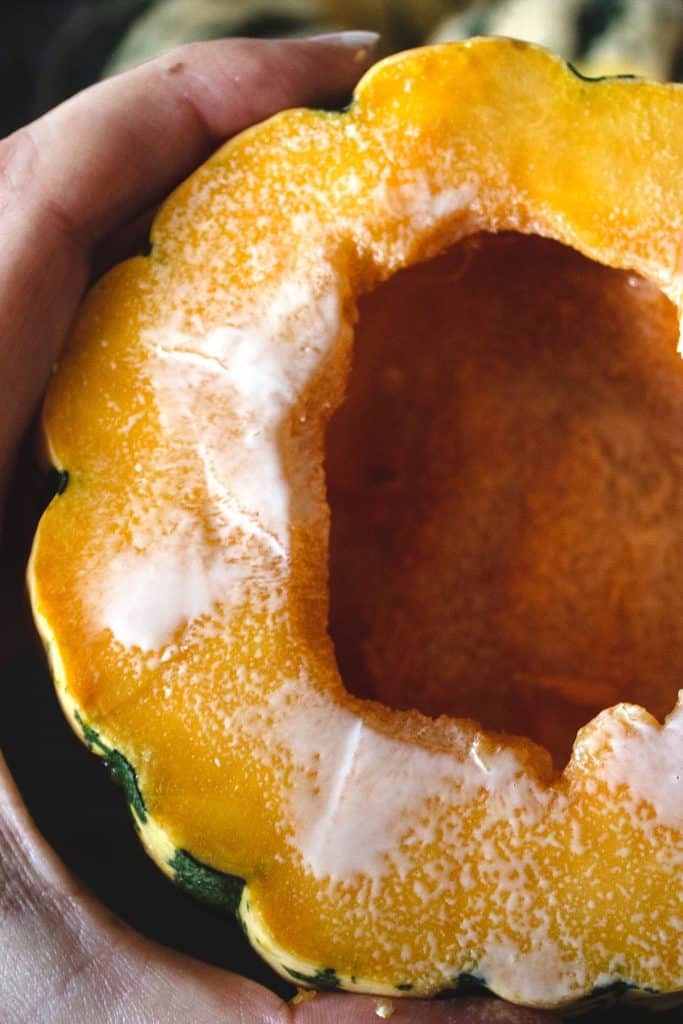
Cut the top off the squash.
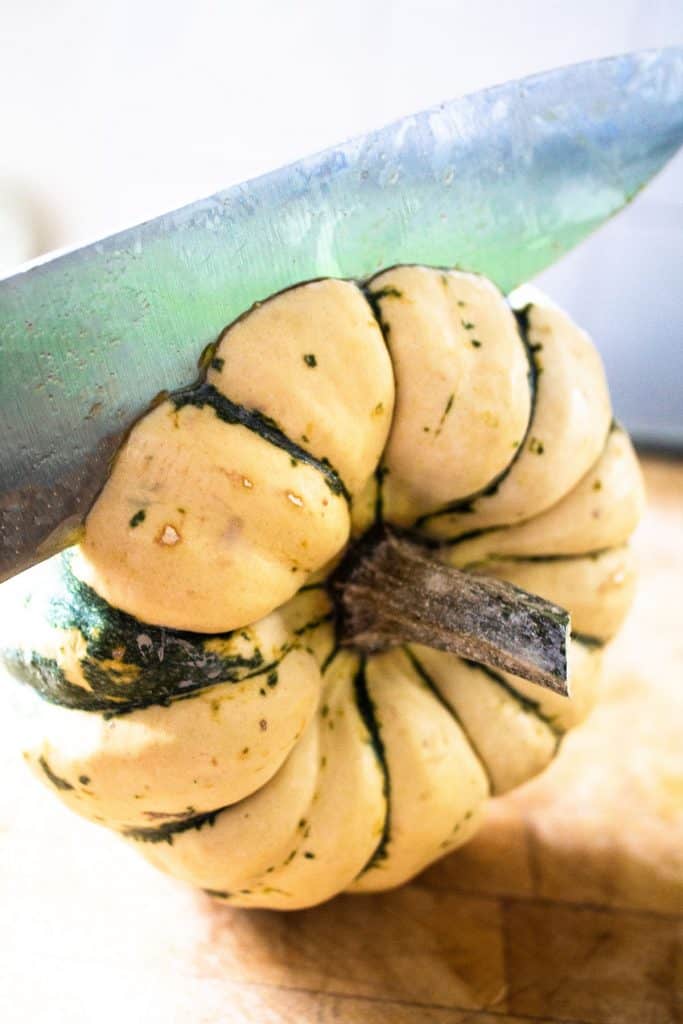
Scoop out the seeds just as you would do when making a Jack-o’-lantern.
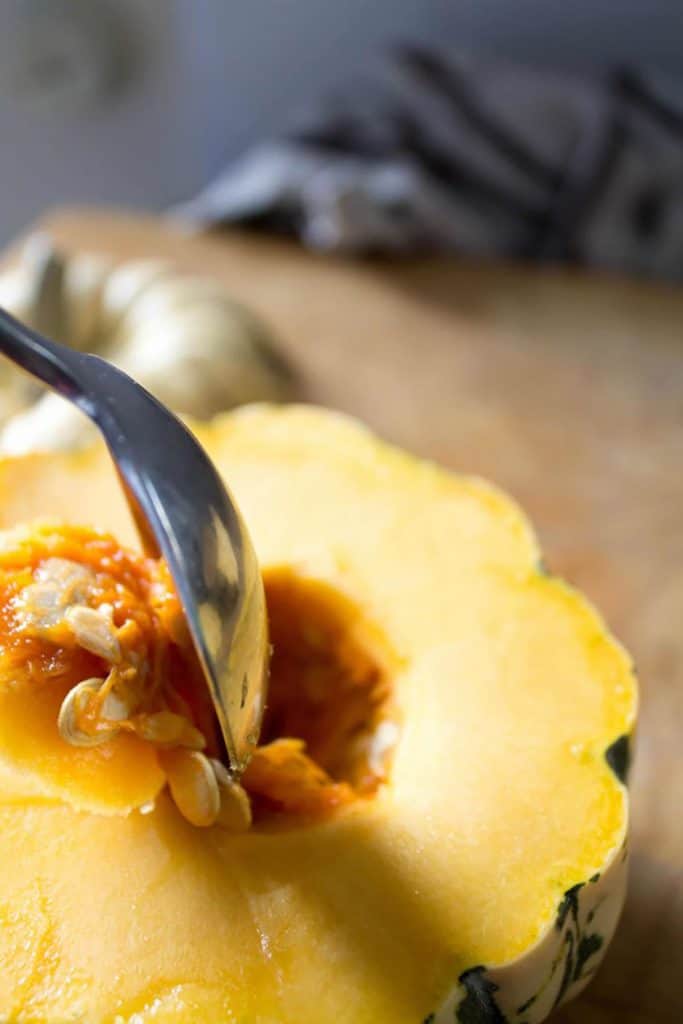
Coat with oil or cooking spray.
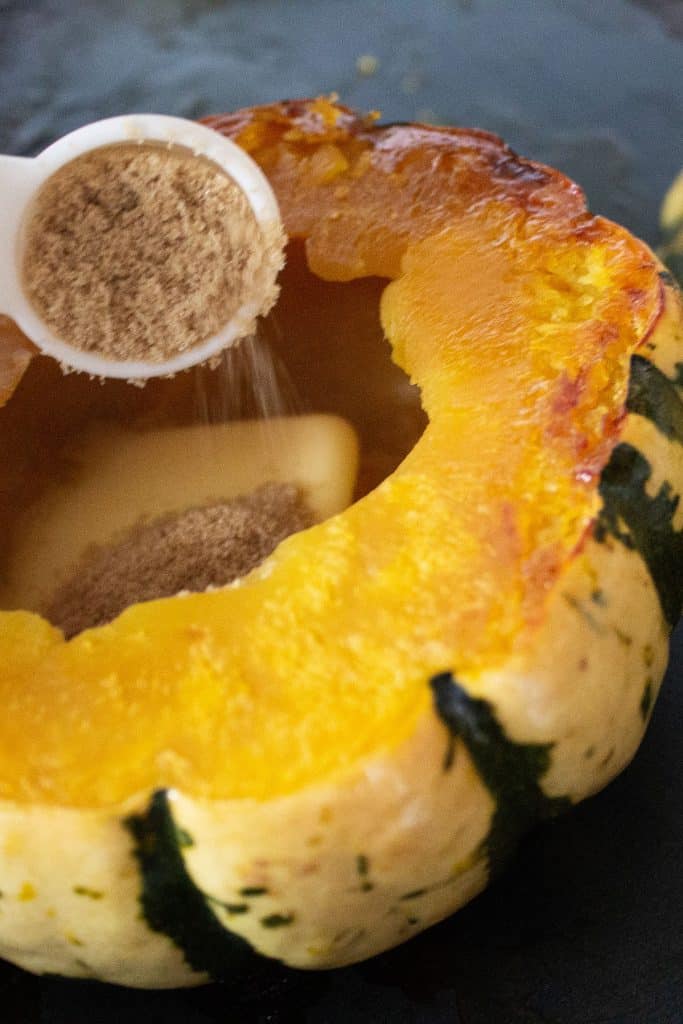
Place the squash with its lid onto a baking tray and roast for 45 minutes. Once out of the oven add butter and brown sugar.
Mash the squash into the shell using a fork.
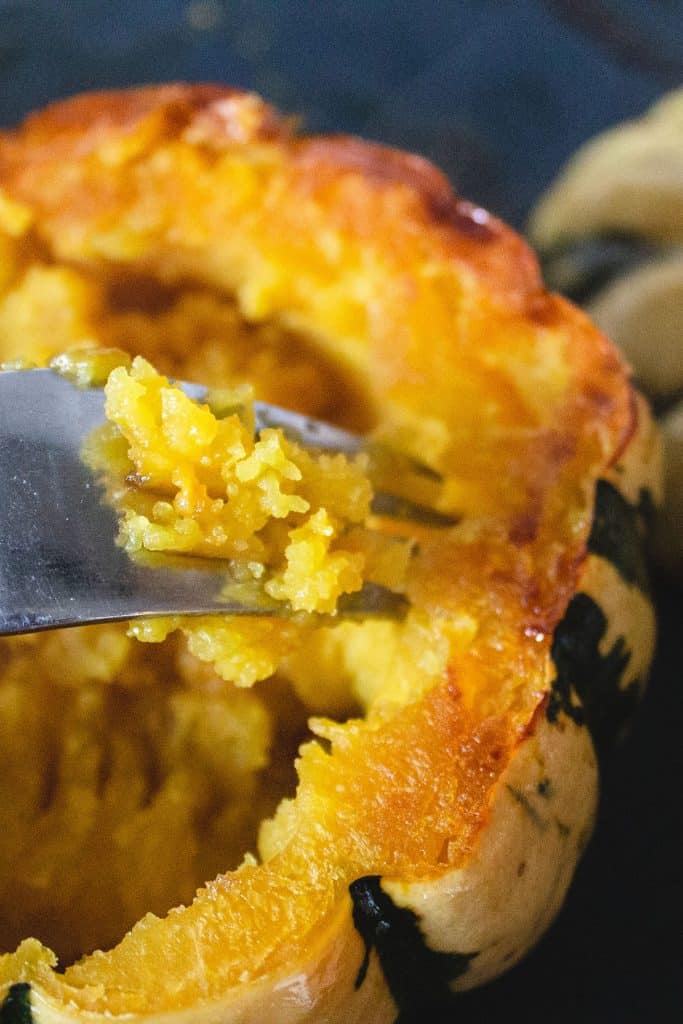
Leave a border of unmashed flesh to keep the shell stable and to prevent collapsing (about a half-inch will do)
Season with salt and pepper and serve in the shell.
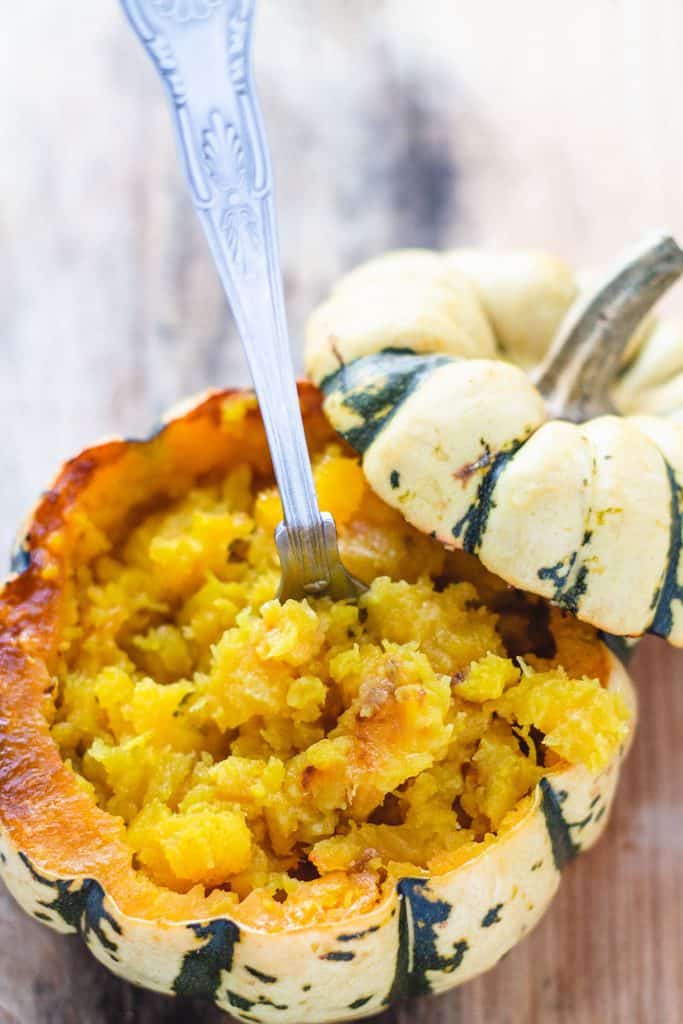
Please note – This recipe calls for eight squash, but only serves four shells as it takes two squash to fill one shell (as pictured). Just remove the flesh from the extra squash, and add it to the one you’re serving before mashing.
More Roasted Vegetables
Tips For Best results
- You can use lids to keep the squash warm for up to 15 minutes. Anything longer will require keeping them in a warm oven.
- Depending on the size of your squash, cooking times will vary. Check for doneness at around 40 minutes. It’s done cooking when the flesh is tender all the way through to the skin.
FAQs
Do you have to peel squash before roasting?
As this recipe shows, you do not need to peel your squash before roasting. However, you can peel the extra squash, slice into cubes, and roast on an oiled oven tray.
What do you eat with roasted squash?
Roasted squash goes with anything from fish, chicken, pork or beef.
Can you freeze roasted squash?
You can freeze the mashed squash removed from the shell in an airtight, freezer-safe container for up to three months.
How do I store leftovers?
Store (removed from the shell) in an airtight container in the refrigerator for up to days.
Recipe Variations
- Use maple syrup in place of the brown sugar for a delicious alternative.
- For a savory twist, leave out the sugar and add your favorite chopped herbs.
- Add shredded cheese instead of sugar before mashing for an all-new dish the kids will love!
Rate This Recipe
Recipe
Showstopper Roasted Squash
Ingredients
- 8 Squash (Dumpling or similar squash)
- cooking spray
- 8 tablespoons butter
- 4 teaspoons brown sugar
- salt and pepper to taste
Instructions
- Preheat the oven to 400F/200C
- Start by cutting the top off the squash and removing the seeds (just like when you make a jack-o’-lantern).
- Coat with cooking spray. Place on a baking sheet with the tops and roast for 45 minutes
- Add the butter and brown sugar directly into the shell.
- Using a fork, gently remove the flesh from the sides and bottom of the shell. Leaving a border of unmashed flesh to keep the shell stable and to prevent collapsing (about a half-inch will do).
- Salt & pepper to taste and serve.
Tips
Update Notes: This post was originally published in 2014, but was republished with new photos, step by step instructions, cooking tips, and a variations in October of 2020.


Leave a Reply