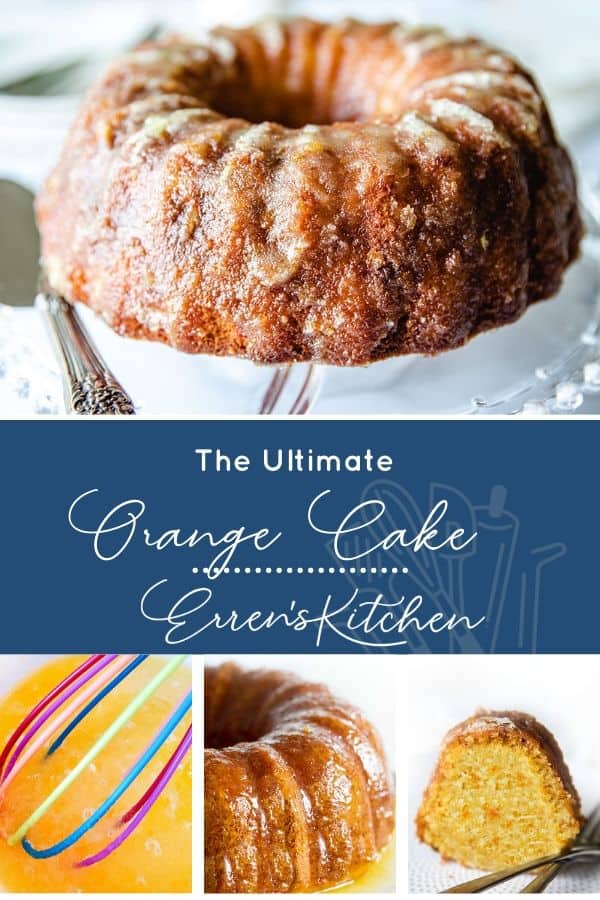
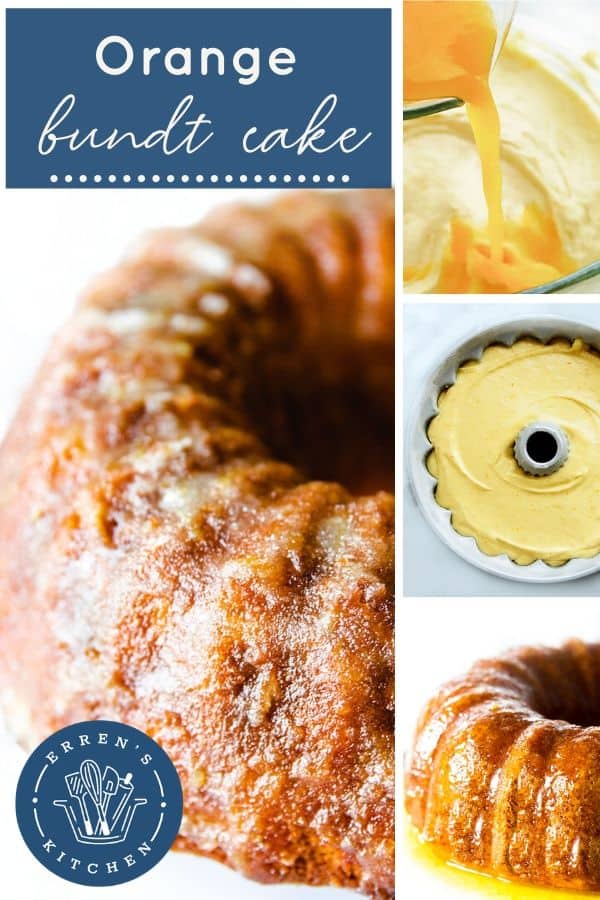
Made with fresh orange juice, zest, and a crunchy orange glaze topping, this Ultimate Orange Cake recipe packs a citrus punch in every bite.
Love citrus cakes? Check out my Lemon Drizzle Cake while you’re here!
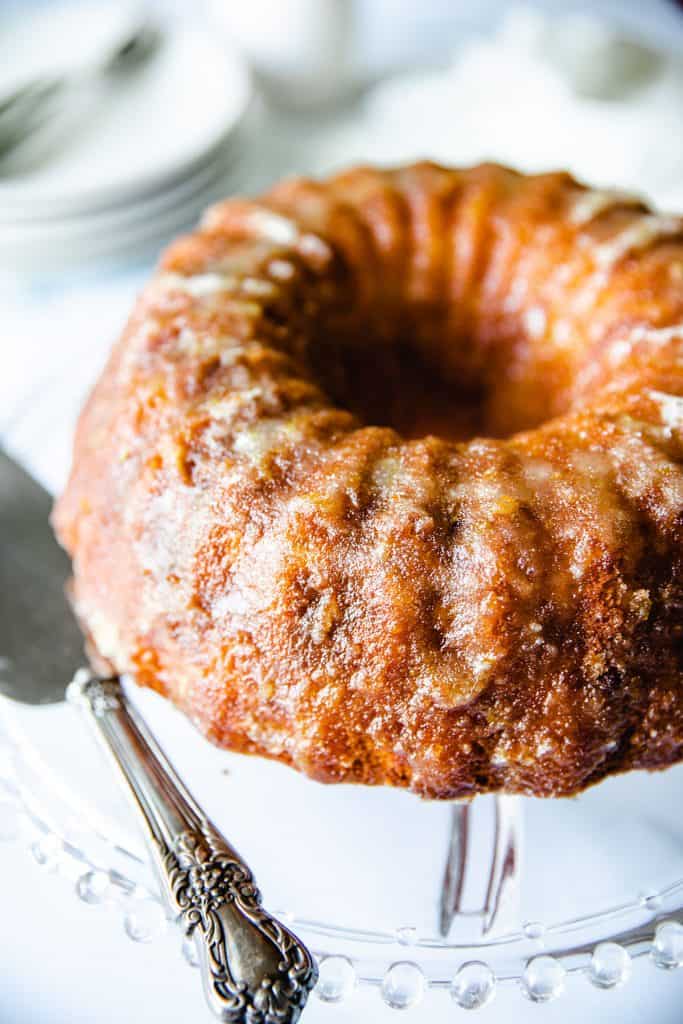
You Choose The Cake Size
This recipe can be made as a Bundt cake, two loaf cakes, or individual cakes using a muffin pan. Baking times are provided for all three options.
This easy-to-make orange cake is tender, moist and bursting with fresh orange flavor. It’s topped with a crunchy glaze for added texture and is sure to become a regular favorite!
Why This Recipe Works
- Using fresh orange juice as well as zest in both the cake and glaze packs this cake with amazing orange flavor.
- The crunchy glaze adds a different texture that takes this cake to a whole new level.
- Using oil as well as butter makes a super moist cake with a buttery flavor that can’t be beat.
Fresh Orange Juice Is Best
To make this recipe, I used an entire bag of small oranges. The end result was worth the effort, as the cake had a delightful orange flavor. I strongly advise using fresh oranges while making this recipe. The use of fresh juice is crucial to achieving that vibrant citrus flavor.
How to Enhance Flavor & Avoid Bitterness in Orange Cake
Make your orange cake sing with sunshiney flavor! Here’s how to unlock the vibrant taste and avoid bitterness:
- Zest magic: Use a microplane or fine grater to get just the zest (colored part) of the orange peel. This packs the most fragrant citrus punch. Avoid the white pith underneath, which can be bitter.
- Ditch the pith: Before using the zest (colored part of the peel), remove as much white pith as possible with a sharp knife. Embrace the blanch: Boiling the whole orange or peel mellows bitterness. Try blanching for a few minutes, then discarding the water and using the softened peel.
Step By Step Instructions
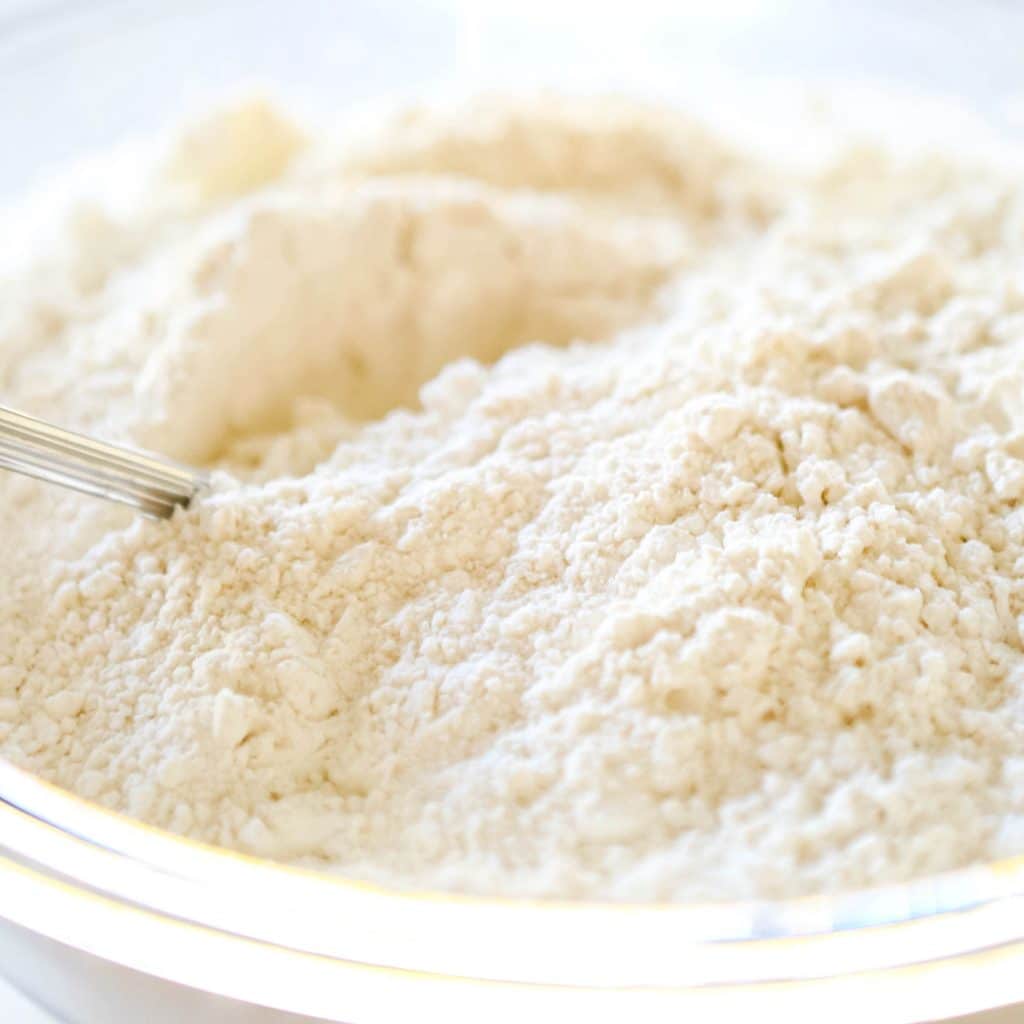
In a medium bowl, combine the flour, salt, and baking soda. Set aside.
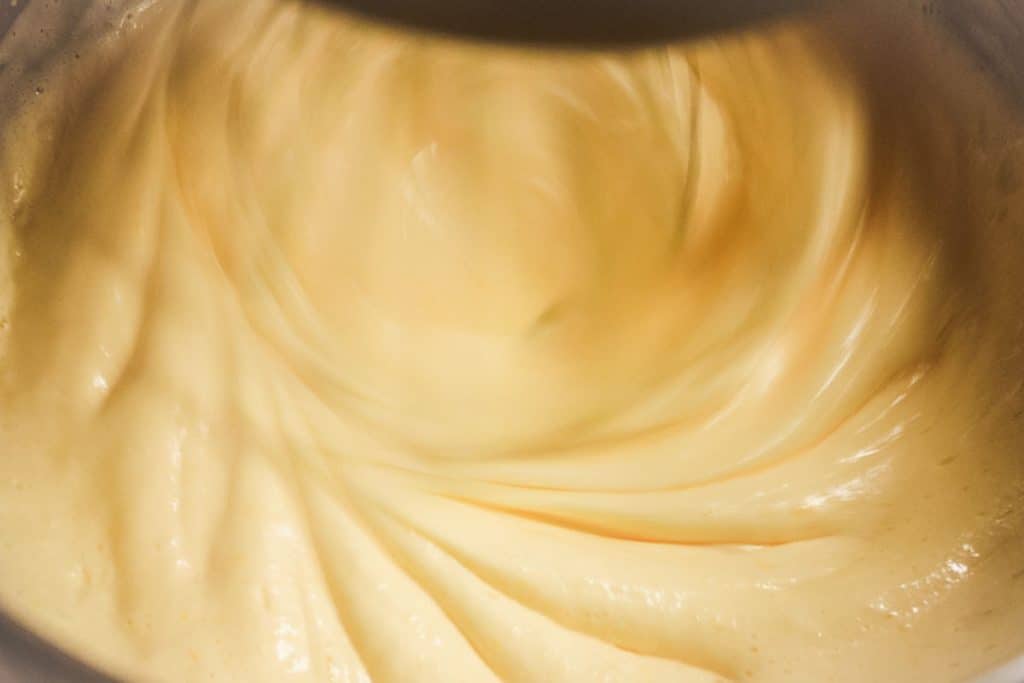
In a mixer fitted with the whisk attachment, whisk together eggs and sugar on high speed until pale and fluffy, about 5 minutes.
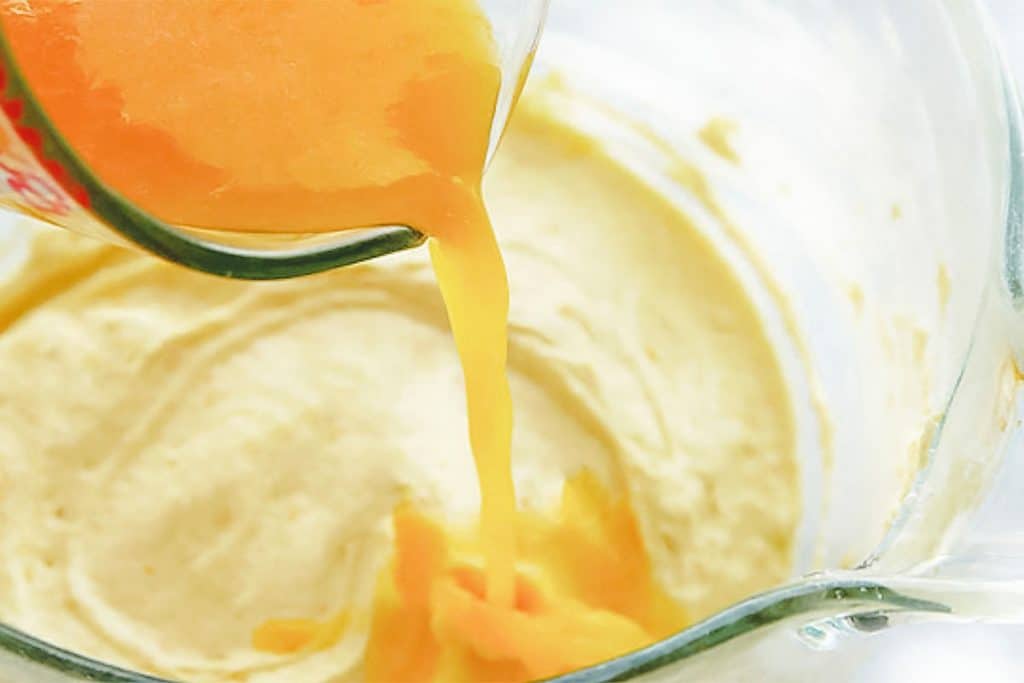
Add the oil slowly until combined and repeat with the butter. Add orange juice and zest and keep mixing slowly until combined.
Add flour mixture mix until just combined (being careful not to overmix).
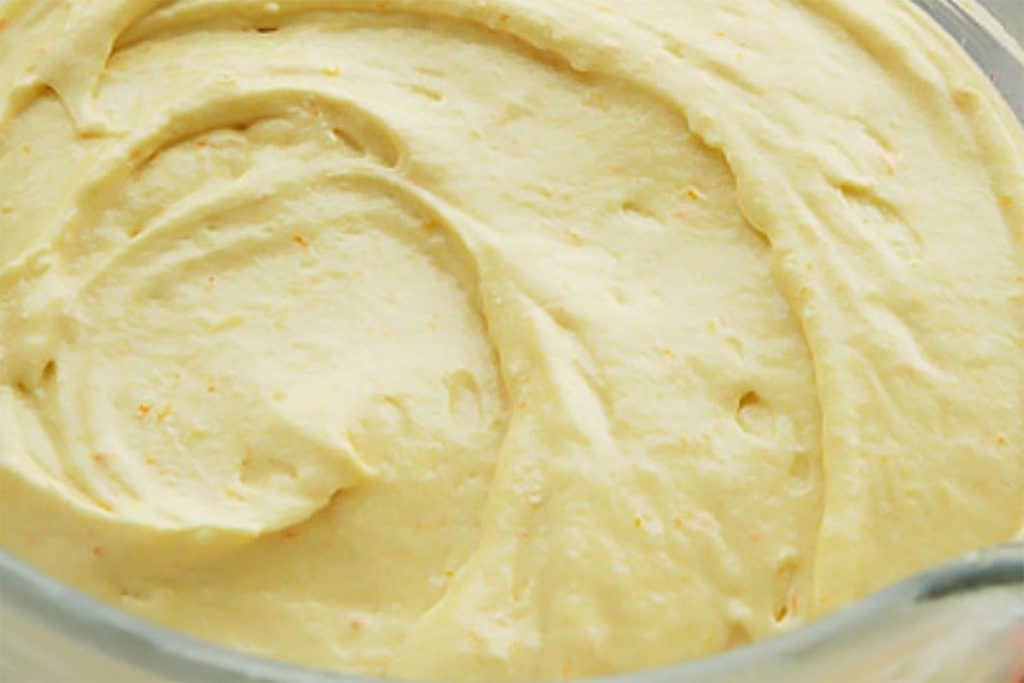
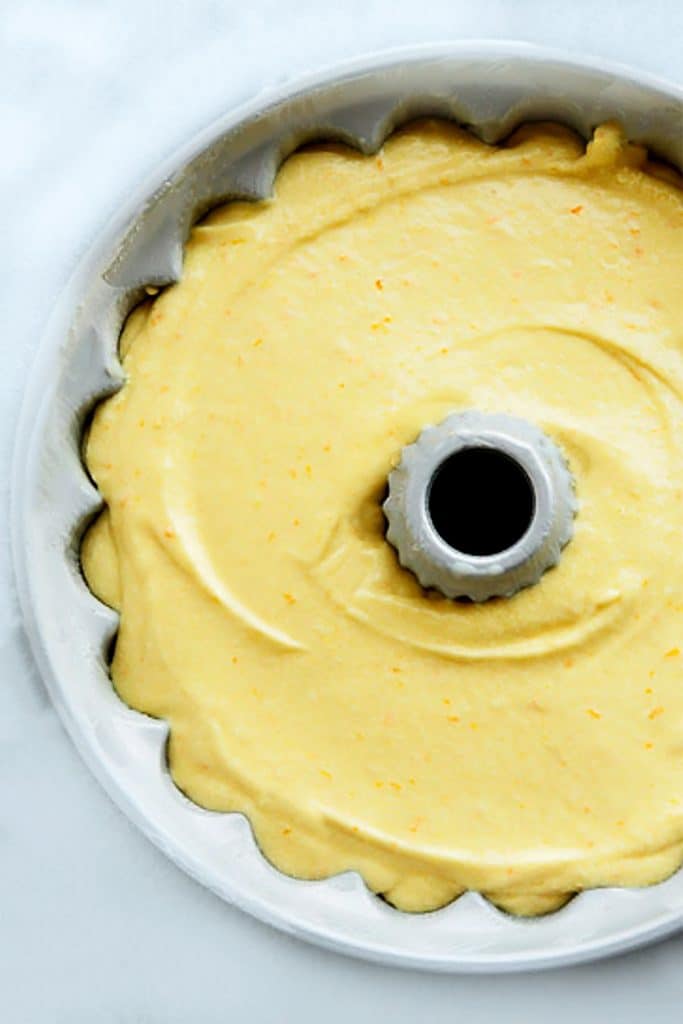
Add batter to a prepared greased pan and bake until a cake tester comes out clean.
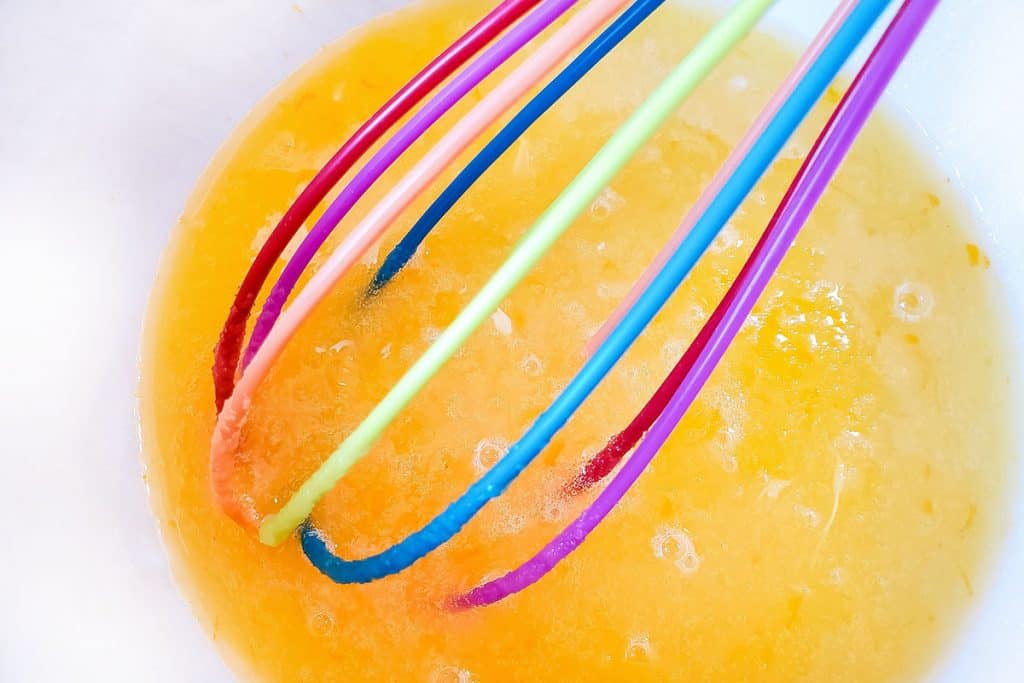
While the cake bakes, make the glaze by mixing orange juice, orange zest, and sugar.
When the cake is done and is still warm, transfer to a wire rack and prick the warm cake all over with a skewer and then pour over the glaze.
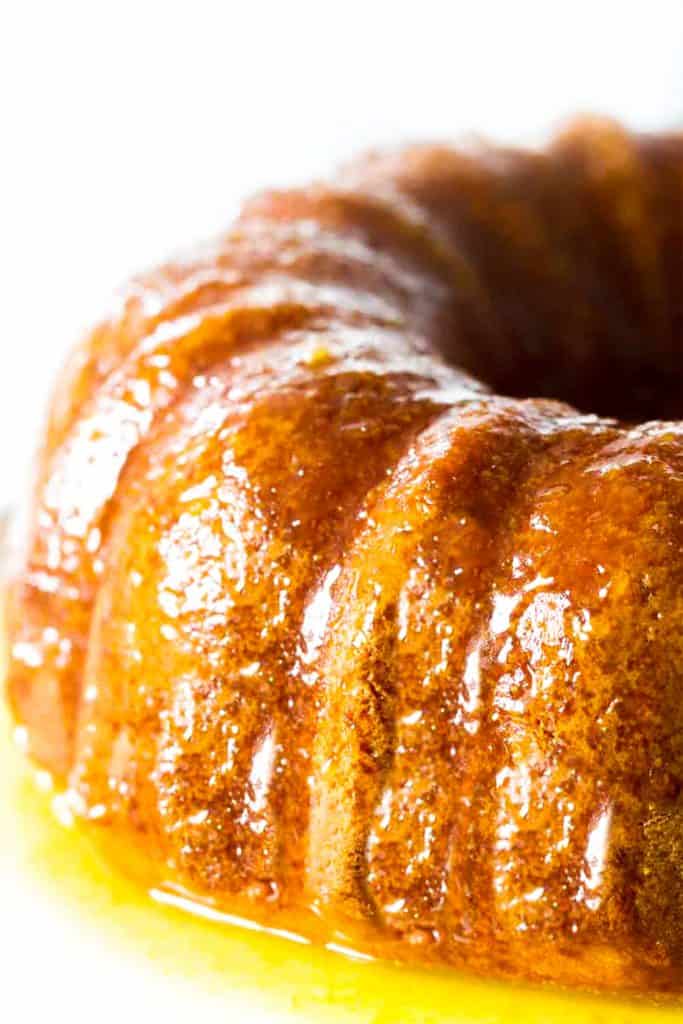
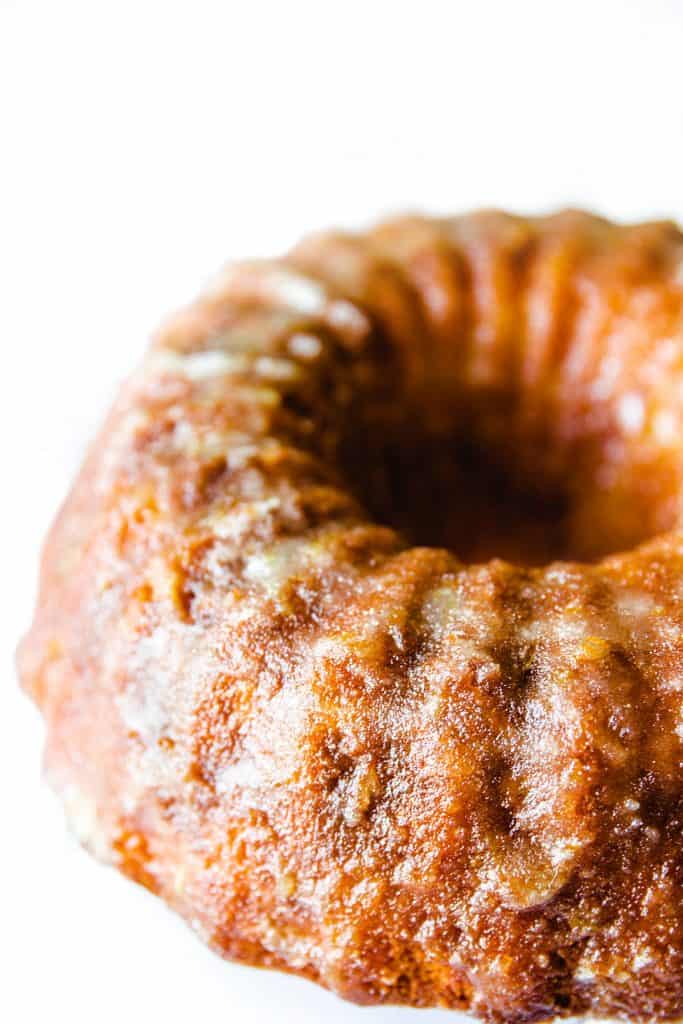
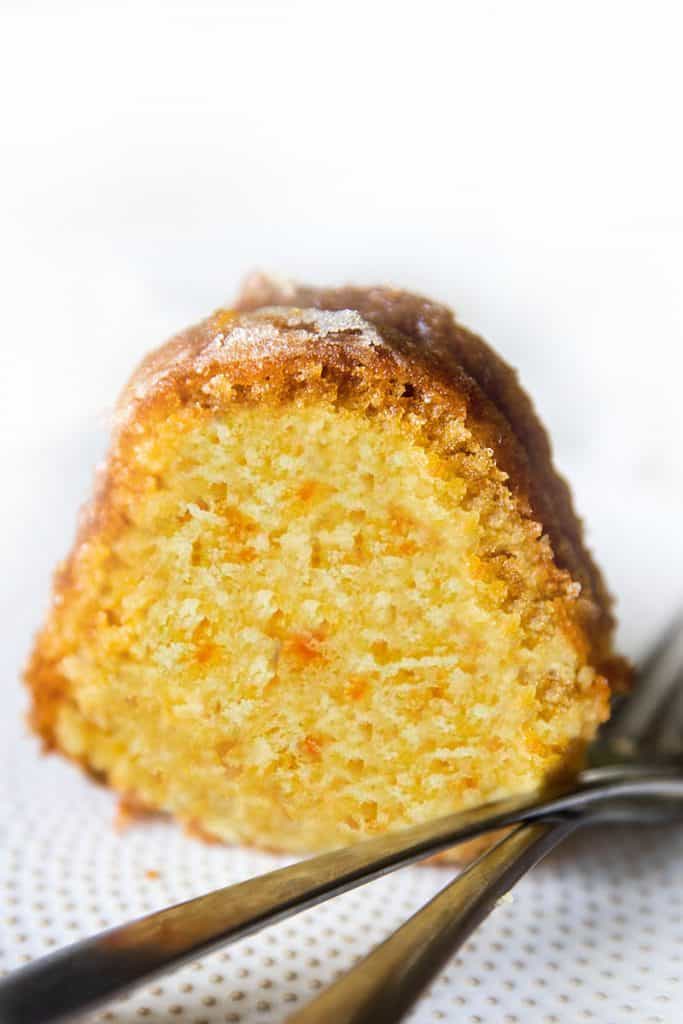
The juice will sink into the cake and the sugar will form a lovely, crisp topping.
Even Better The Next Day
With this recipe, the orange flavor becomes stronger with time, giving you a citrus burst in every bite. For the ideal texture, leave the cake to rest in an airtight container for 8 hours at room temperature before serving.
Storage & Freezing Instructions
Storage: Once the cake is completely cooled and glazed or iced, store it in an airtight container or wrap it tightly with plastic to keep it fresh.
The cake can be stored at room temperature for up to 3 days. Keep it cool and dry, away from direct sunlight or heat sources.
Freezing: If you want to freeze the cake for later consumption, it’s best to freeze it before glazing or icing to maintain the texture and freshness.
Wrap the cooled, unglazed cake securely with plastic wrap, followed by a layer of aluminum foil, to prevent freezer burn and odors from seeping in.
Label the wrapped cake with the freezing date for easy reference. The cake can be frozen for 2-3 months without compromising quality.
Thawing: To thaw the frozen cake, remove it from the freezer and let it defrost in the refrigerator overnight.
Once thawed, you can glaze or ice the cake if desired. If using a crunchy sugar glaze, you can apply it to the slightly warm, thawed cake.
Important Note: The freezing and thawing process may affect the texture of the glaze or icing. If you’re concerned about the appearance, you can opt for glazing or icing the cake after thawing. However, glazed and iced cakes should still taste delicious after freezing.
Tips For Best Results
- This recipe uses oil and butter, but you can use them interchangeably on your preference.
- It’s important to beat your eggs well for a light and fluffy result. You’re looking for them to reach the ribbon stage.
- I highly recommend using fresh oranges for this cake. Using fresh juice is key to getting that bright citrus flavor.
- For the zest, it’s much easier to zest the oranges before juicing.
- Be sure to only zest the orange portion of the peal as the white will be bitter.
- If the top of the cake browns quickly while baking, cover loosely with aluminum foil.
- Once glazed, let the cake cool completely before serving. It’s even better the next day!
- For More Vibrant Color, add some orange food coloring to the batter to achieve a bright orange color. This step is totally optional.
Did you make this?
Stay Updated
Receive new recipes & dinner ideas straight to your inbox!
Let’s Make Ultimate Orange Cake
Ingredients
For The cake
- 2½ cups all-purpose flour sifted
- ¾ teaspoons baking soda
- ½ teaspoon salt
- 4 large eggs
- 1½ cups granulated sugar
- ½ cup canola oil
- ½ cup butter melted
- 1¼ cups freshly squeezed orange juice 3-4 large oranges
- 2 tablespoons orange zest plus more to taste*
For a Crunchy Sugar Glaze
- ⅓ cup fresh orange juice 1-2 orange
- 2 teaspoons orange zest
- 1 cup granulated sugar
For an Icing Glaze
- ⅓ cup fresh orange juice
- 1 tablespoon orange zest
- 1 tablespoon melted butter
- 2 cups powdered sugar
Instructions
- Begin by preheating the oven to 350°F/180°C and greasing the pan.
- In a separate medium-sized bowl, combine the flour, baking soda, and salt, then set it aside.
- Next, using a mixer fitted with the whisk attachment, beat together the eggs and sugar on high speed until the mixture becomes pale and fluffy, which should take about 5 minutes.
- With the mixer running on low speed, slowly add the oil and then the butter, being sure to combine thoroughly. Add the orange juice and zest and continue mixing slowly until everything is combined. Finally, add the flour mixture and mix until just combined, taking care not to overmix.NOTE: depending on the brand of flour you use, the batter may be quite wet.
- Add batter to the prepared pan. Bake 50 to 60 minutes for a 12-cup/10-inch bundt pan until a cake tester inserted into the center comes out clean (see recipe notes for more pans and cooking times).
- Allow to cool for 30 minutes in the pan before turning out onto a cooling rack.
For The Crunchy Glaze (Applied to Warm Cake)
- In a small bowl, mix together the orange juice, zest, and sugar and mix well until combined.
- Place a sheet of baking paper under the cooling rack to catch any glaze that drips off the cake. While the cake is still warm, remove it from the pan, prick the cake all over with a skewer, and then pour over the glaze.
- Place a second sheet of baking paper next to the cooling rack and move the cooling rack over to the clean paper.
- Use the original sheet of paper to pour any excess glaze that drips off the cake back onto the cake. Repeat this step as needed to make sure the cake is thoroughly glazed.
- Set the glazed cake aside to set the glaze and finish cooling. As the glaze sets, the juice will sink into the cake, and the sugar will form a lovely, crisp topping.
For A Soft Icing Glaze
- Allow the cake to cool completely.
- Combine the orange juice, zest, butter and sugar in a small bowl and stir until well mixed and smooth. In case the icing is not easily pourable, you may heat it in the microwave for about 30 seconds. If the consistency is still too thin, gradually add more sugar until it reaches the desired thickness.
Tips + Notes
- To avoid sticking to the pan, allow the cake to cool in the pan for 30 minutes.
- With this recipe, the orange flavor becomes stronger with time, giving you a citrus burst in every bite. For the ideal texture, leave the cake to rest in an airtight container for 8 hours at room temperature before serving.
- As this recipe uses oil instead of butter for extra moisture, it’s important to beat your eggs well for a light and fluffy result.
- I highly recommend using fresh oranges for this cake. Like my Lemon Drizzle Cake, fresh juice is key to getting that bright citrus flavor.
- For the zest, it’s much easier to zest the oranges before juicing. Be sure to only zest the orange portion of the peal as the white will be bitter.
- If the top of the cake browns quickly while baking, cover loosely with aluminum foil.
- Once glazed, let the cake cool completely before serving. It’s even better the next day!
Nutrition Information:
This recipe was updated in 2021 to add a video.





Luci says
Hello Erren,
I will make this cake soon.
I’m wondering about on the recipe you have oil and butter, but on the tips below you say that this cake is made with oil to be more moist.
Would you please clarify?
Thank you.
Erren Hart says
Absolutely, I’d be happy to clear things up for you. In the orange cake recipe, both oil and butter are used to achieve the desired texture and flavor. The oil helps keep the cake moist, while the butter adds a rich and buttery flavor.
In the tips section, I mentioned you can use all oil if you prefer. It’s just an extra option for those who may not have all of the ingredients handy. But don’t worry, if you follow the recipe with both oil and butter, you’ll still end up with a super tasty and moist orange cake.
So, feel free to choose the approach that suits your taste buds and have a blast making this scrumptious orange cake. And if you have any more questions, just let me know. Happy baking!
Naveen Kollipara says
I loved the recipe so much!
Erren Hart says
Thank you so much for your wonderful feedback! I’m so glad to hear that you enjoyed the recipe so much!
Christine says
I’m almost 60 years old and am a very good cook and baker–having started in the kitchen at age 8. I select my recipes very carefully. Imagine my horror when I decided to make this cake (for the first time) for a family reunion, and it was an embarrassment. I should have known by the technique and directions, but made it anyway. Let me say that I followed the directions PRECISELY. I did NOT overwork the batter (I incorporated the flour by hand by folding it in with a silicone spatula). I have an oven thermometer and my oven works just fine. My cake was done at 46 minutes. I had to cover the top with foil. My cake was WELDED to the pan. It was VERY dark. And the crumb on this thing is like bread–not cake–which is very off-putting. Orange cake should have a velvety texture and fine crumb. The flavor was good though. I’m a perfectionist (think like a female Gordon Ramsay). I will try it again though, because obviously, something went wrong. I’m going to make it in parchment lined loaf pans rather than a Bundt pan and will adjust the technique. But the recipe, made PRECISELY as written, just isn’t great.
Erren Hart says
Hi Christine, I apologize for the disappointment you experienced with the cake. I appreciate your attention to detail and dedication to baking. However, I’m surprised to hear this feedback as this recipe has received over 200 reviews with a 5-star rating, and many have had great success. I make it often for family gatherings with excellent results. My extended family loves the soft and moist texture and requests it frequently.
I’d love more details if you don’t mind – Did you bake the cake using a convection or fan oven? Overbaking is a common issue when using these types of oven settings. If not, it may be worth checking the temperature of your oven with a thermometer to ensure it’s accurate. I would also love feedback on what you used to grease your pan because sticking to the pan is something I get little negative input with.
I’m glad to hear that you are willing to give the recipe another try with some adjustments. If you need any further guidance or support, don’t hesitate to reach out. Thank you for your feedback and for considering this recipe again.
Jan says
As I mentioned to you before, I am making this cake in a few days for my mom-in-law. I have a new oven & it has a fan that’s on even on regular baking mode. Do I need to change anything when baking? I will be using a dark bundt pan. Also, what brand of flour do you prefer? Also, do you fluff your flour before measuring like some recommend?
Erren Hart says
When baking the cake in an oven with a fan, it’s generally recommended to reduce the temperature by about 25°F (or 15°C) and keep a close eye on the baking time. This adjustment helps ensure even baking and prevents the cake from browning too quickly. As for the dark bundt pan, it may cause the cake to brown more quickly, so you can consider reducing the baking time slightly or covering the top with foil if it starts to brown too much.
Regarding flour, it’s best to use a reputable brand that produces consistent results. Different brands may have slight variations in protein content and texture, which can affect the final outcome of your cake. As for measuring flour, it’s generally recommended to fluff the flour with a fork or whisk to loosen it up, then lightly spoon it into your measuring cup and level it off with a straight edge. This helps prevent packing the flour, which can lead to a denser cake. Happy baking, and I hope your mom-in-law enjoys the orange cake!
Jan says
Erren, thanks so much! I am prepping for this cake now & will let you know how it goes. As oranges are a winter crop here in south Florida, I went to the produce market & bought California cara cara oranges. I was nervous about them because I had never heard of them. They are a newer natural navel hybrid. Anyway, they are a beautiful rosy color, like a ruby red grapefruit, sweet, very flavorful.& juicy. So juicy, I even sent the 2 extra oranges with my hubby for lunch. Had to pay him for juicing & zesting the oranges. He was very happy with the bargin. And, yes, I will leave the other review when things slow down a bit. 😉
Erren Hart says
Thank you for your delightful comment! I’m glad to hear that you’re prepping for the orange cake and that you found some beautiful cara cara oranges. They sound absolutely delicious with their rosy color and sweet, juicy flavor. It’s great that your hubby was able to help with juicing and zesting the oranges, making it a fun and rewarding experience for both of you. I hope the cake turns out wonderfully and becomes a delightful treat for you and your loved ones. Whenever you find the time, I would love to hear your review. Enjoy the baking process and savor every bite of that flavorful cake!
Wendy says
I have to respectfully disagree. This cake was light, fluffy and just delicious! I would have to guess you did something wrong. It may be with trying again with Erren’s Tips.
Erren Hart says
Thank you for sharing your experience and offering a different perspective. I’m glad to hear that you found the cake light, fluffy, and delicious. Sometimes, variations in technique or ingredients can affect the outcome, so it’s possible that there was a misstep in Christine’s attempt. It’s always worth giving a recipe another try, especially with the helpful tips provided. I appreciate your respectful disagreement and your positive feedback. Happy baking!
Connie says
This is an absolutely wonderful recipe. Made for husband birthday and we both enjoyed it tremendously.
Erren Hart says
I’m glad to hear that you and your husband enjoyed the orange cake recipe! It’s always great to celebrate special occasions with a delicious homemade treat. Thank you for trying the recipe, and I hope it added a touch of sweetness to your husband’s birthday celebration.
Adriana B. says
Hi, short question. Do the glaze need to be boiled or is actually just orange juice with sugar added and called glaze?
To make it clear, is bout the orange cake glaze, not the icing version.
Thank you
Erren Hart says
Hi Adriana, no, the glaze does not have to be boiled. Just follow the directions in the recipe. I hope you enjoy it.
Melissa Murillo says
I have a question regarding the recipe, do I use both the “crunch glaze” and the “icing”? Or is the icing the alternative to the glaze? In your recipe under the 6th step, it says to see notes for softer style of glaze. Thanks in advance.
Erren Hart says
Hi Melissa, Sorry for the confusion. I just added the icing glaze option today as, through comments, I realized some people prefer a more traditional icing glaze. Thank you for pointing out the misprint. I’ve made the appropriate changes to the recipe.
Charles Hebert says
Very happy with the results! I would definitely bump the orange zest to the amount called for in the original recipe (3 to 4 tablespoons, as I prefer a citrusy taste to a buttery taste for this particular cake). My only variation was to add about a 1/4 cup of leftover candied orange/lemon peel to the batter. It added both texture and some an extra zing. In terms of the written recipe, I feel that a few things could be made a bit clearer. Firstly, when I read the “Tips For Best Results” section, I originally thought the recipe only called for oil, whereas it should be understood that oil is used for moisture, and butter is used for flavor. Secondly, I’m still not sure exactly when to pour the glaze onto the cake. Do you let the cake cool in the pan for 30 minutes, turn it over onto the cooling rack, and then pour the glaze (after pricking it with the skewer)? Thirdly, step 9 calls for a second sheet of baking paper to be placed next to the cooling rack, but there’s no mention of the first sheet of baking paper (I’m assuming the first sheet is placed under the cooling rack to receive any drips the first time the glaze is poured onto the cake. Is this accurate?). Confusion aside, this recipe was a hit with my family and is definitely a keeper! Love the texture, the flavor, the crunchy sugar glaze AND the fact that it’s still moist days after being prepared. Thank you, Erren!
Erren Hart says
Thank you for trying out the recipe and sharing your feedback! I’m glad to hear that you enjoyed the cake, and the addition of candied orange/lemon peel sounds delicious. I appreciate your notes on the recipe and will take them into consideration for future updates. To answer your questions, the glaze should be poured onto the cake after turning it out onto the cooling rack and pricked with a skewer. And you are correct that the first sheet of baking paper is placed under the cooling rack to catch any drips from the first glaze. Thank you again for your kind words, and happy baking!
Shanna says
Is it easy to glaze the cupcakes/muffin?
Erren Hart says
Sure, the method is the same, just in a smaller form. You can also dip them into the glaze instead of pouring it on.
Linda Davey says
This recipe makes a delicious cake. I made a couple of preparation mistakes: I added the sugar to the bowl of dry ingredients and mixed them up, then re-read that the recipe says to mix the eggs with the sugar. Anyway, it still turned out great. I just wonder how much better it might have been if I had combined the eggs with the sugar. Then I misread when to apply the glaze….let the cake cool for 30 mins before pouring on the glaze. However, it still turned out very delicious. (also, as I am a Celiac, I used Gluten free flour, in this case, I used half Robin Hood GF and half Bob’s Red Mill 1 for 1 and added a bit of psyllium (ground) as I did not have any xanthum gum.) Needed to bake for just under 55 minutes.
Erren Hart says
Thank you for trying the orange cake recipe and sharing your experience with us. We’re glad to hear that the cake turned out delicious despite the minor preparation mistakes. Mixing the eggs with the sugar does help to create a lighter and more tender crumb, but we’re glad to hear that it still turned out well.
Regarding the glaze, it’s best to pour it over the cake while it’s still warm so that it can absorb the flavors better, but we’re happy to hear that it still turned out delicious even after cooling for 30 minutes.
We appreciate your note about using gluten-free flour in the recipe and the specific brands you used. It’s always helpful for our readers who have dietary restrictions or preferences. We’re glad to hear that the gluten-free version of the cake turned out well and required just under 55 minutes of baking time.
Thank you again for trying the recipe and sharing your experience. We hope you enjoy making it again in the future!
MaDina says
Hi! I want to try your recipe. But I noticed you did not use baking powder. Is it ok without it?
Erren Hart says
Absolutely! This orange cake recipe uses baking soda instead of baking powder, and it works perfectly fine. Baking soda helps the cake rise and creates a tender texture. The combination of ingredients in this recipe, including the acidic orange juice, activates the baking soda and helps the cake to rise. So rest assured, you don’t need to worry about using baking powder. Give it a try, and I’m sure you’ll enjoy the delicious citrusy flavors of this orange cake. Happy baking!
Sydney says
where the fuck is the recipe ???????
you told me ten ways to make it and how the fuck you chose the ingredients you did. And Im sorry your husbabd bought you a fucking stand mixer instead of a diamond for your anniversary. But your recipe is harder to find than sanskrit translation for hard tack!!!
Erren Hart says
It seems like you might have missed the button at the top of the post that says ‘recipe’ which takes you directly to it. If you’re having trouble finding the recipe, maybe you need to take a break, grab a snack, and return with a fresh perspective. By the way, I appreciate your concern about my anniversary gift, but my husband got me a diamond, and I got myself the stand mixer. Let’s focus on finding the recipe so you can satisfy that hunger and get back to being your charming self.
Sharon says
Right?! What would ever make a person “act” like that? I feel like I have to apologize for her behavior and I don’t even know her!!
Erren Hart says
Hi Sharon, I understand, but no need – it happens. Seeing someone leave such a rude or disrespectful comment can be disheartening, but as the saying goes, “You can’t please everyone!” I try to focus on positive feedback, continue sharing recipes, and enjoy my audience. Thank you for your support!
Sakshi Singh says
Hello! I’ve tried this recipe out before and it’s simply phenomenal. The cake comes out super moist and full of flavour. I was wondering if I could substitute the eggs & in place what would you recommend best ? My sister is allergic to eggs 🙁
Erren Hart says
I’m glad to hear that you enjoyed the recipe! As for the eggs, this recipe is tricky to substitute because the eggs are whipped with sugar. If you are unable to use eggs in the recipe, then you will need to replace them with an appropriate egg substitute. However, this step of whisking together the eggs and sugar until pale and fluffy is important in creating the desired texture and structure of the cake. Therefore, you can replace the eggs with an egg substitute that provides a similar level of aeration and structure, such as aquafaba or whipped silken tofu. You would need to whisk the substitute together with the sugar until the mixture becomes pale and fluffy, which may take slightly longer than 5 minutes, depending on the substitute used. Once you have achieved the desired consistency, you can proceed with the recipe as usual, but results do vary. Please let me know how it goes!