This site runs ads and generates income from affiliate links. Read my disclosure policy.
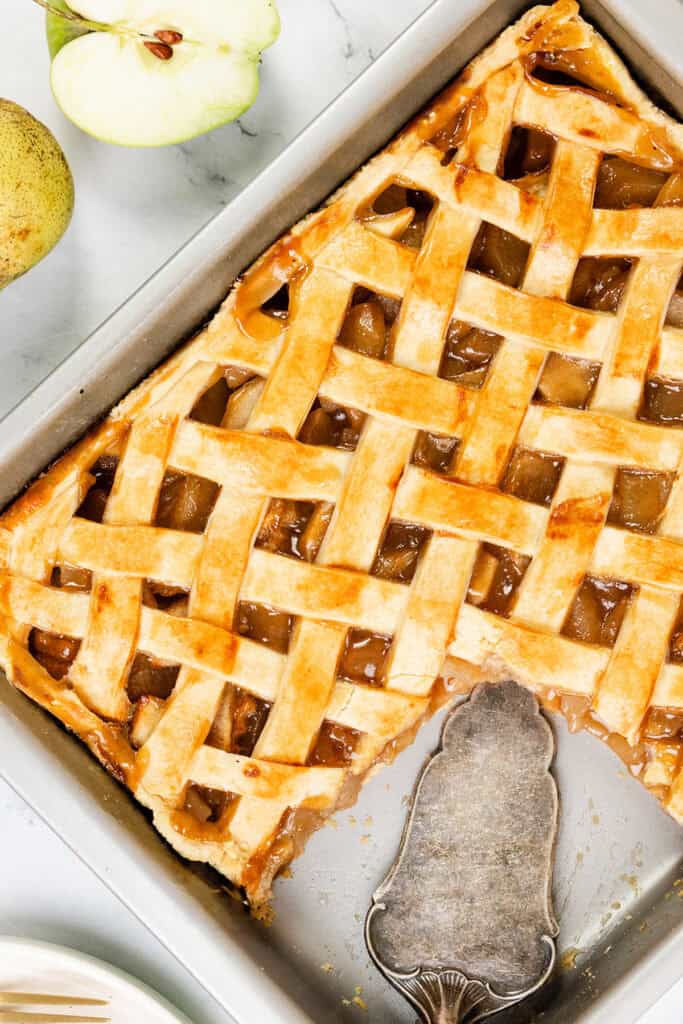
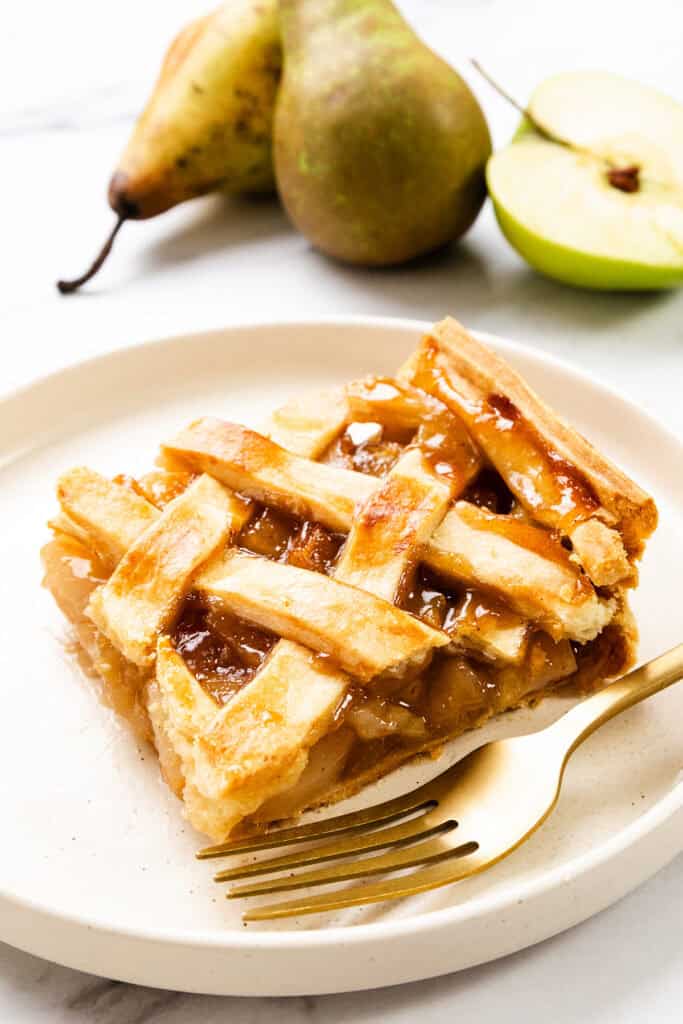
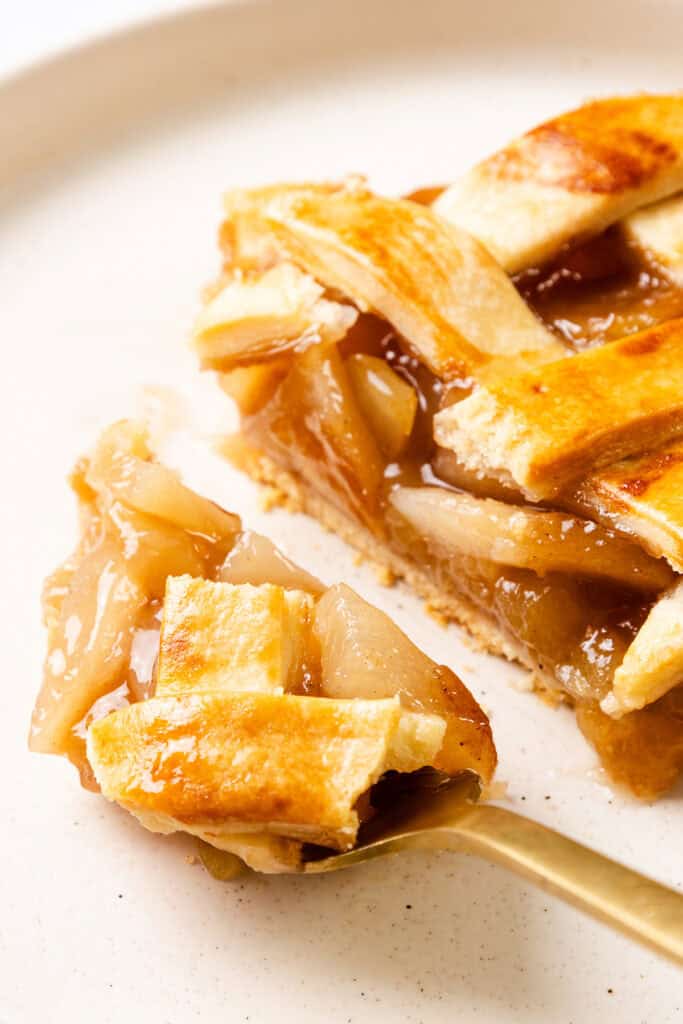
This Apple and Pear Pie is a delicious slab pie layered with warm spices and a flaky crust. Perfect to feed a crowd at gatherings or family dinners!
Every Thanksgiving, I host a dinner for 15 to 20 people, meaning I need desserts to feed a crowd. That’s how this Apple and Pear Slab Pie became a new holiday staple. Unlike traditional pies, this recipe uses a 9×13 pan and separates the fruit into two layers. Because apples and pears cook at different rates, the apples are cooked briefly before baking to ensure both layers are tender and flavorful by the time it’s ready to serve. The result? A perfect blend of sweet pears and spiced apples in every bite, with a flaky crust that family and friends can’t get enough of.
A 9×13 slab pie typically serves about 12 to 15 people, depending on how large you cut the pieces. For smaller portions, especially if it’s part of a larger dessert spread with treats like pumpkin pie or pumpkin bundt cake, you could get up to 18 servings. This makes it an ideal choice for feeding a crowd at family gatherings or holiday meals.
Why This Recipe Works
- Balanced Fruit Flavors: The layering of apples and pears brings a unique balance between sweetness and tartness, with both fruits retaining their natural flavors.
- Spiced Perfection: Each layer is seasoned with cinnamon and nutmeg, creating a warm, aromatic taste that enhances the fruit’s natural flavors.
- Flaky, Buttery Crust: The dough is made with chilled butter and just a hint of vodka to keep it extra flaky, complementing the soft fruit filling perfectly.
Ingredient Notes

- Flour: For the best crust, use all-purpose flour, which provides the right amount of gluten. You can find it in the baking aisle. Avoid cake flour, as it may make the crust too delicate.
- Butter: Unsalted butter is best for this crust, as it allows you to control the salt. Make sure it’s very cold and cubed, which helps achieve a flaky texture.
- Vodka or Water: Use iced vodka or iced water (½ cup/118 ml). Vodka, unlike water, won’t form gluten, giving you a softer crust. Remember, the ice chills the liquid, but don’t add the ice itself.
- Apples: Choose a mix of sweet and tart varieties, such as Granny Smith and Honeycrisp. About 6 medium apples (6 cups/720g) are ideal. Look for fresh, firm apples in the produce section.
- Pears: Bartlett or Bosc pears work well in this pie, as they hold up nicely when baked. You’ll need about 6 medium pears (5 cups/600g), which you’ll find in the produce section.
- Spices: Use ground cinnamon (2 tsp/5g) and nutmeg (¼ tsp/0.5g) for both layers. This warm spice mix brings depth to both fruits.
Step By Step Instructions
You can find the full, printable recipe at the bottom of this post (click the button above), but you can read a summary with step-by-step instructions and photos for each step below.
To Make The Crust
In a large mixing bowl, combine 5 cups (600g) of all-purpose flour and 1 teaspoon of salt. Toss vegetable oil in 3 tablespoons to lightly coat the flour.
Coating the flour with oil first helps make a pie crust that’s tender and flaky. The oil covers the flour particles, which keeps them from forming too much gluten when you add the butter and liquid. Less gluten means a softer, flakier crust that’s not tough. This simple step makes a big difference, helping the crust stay light and crisp while holding up to the thick, juicy layers of apple and pear filling.
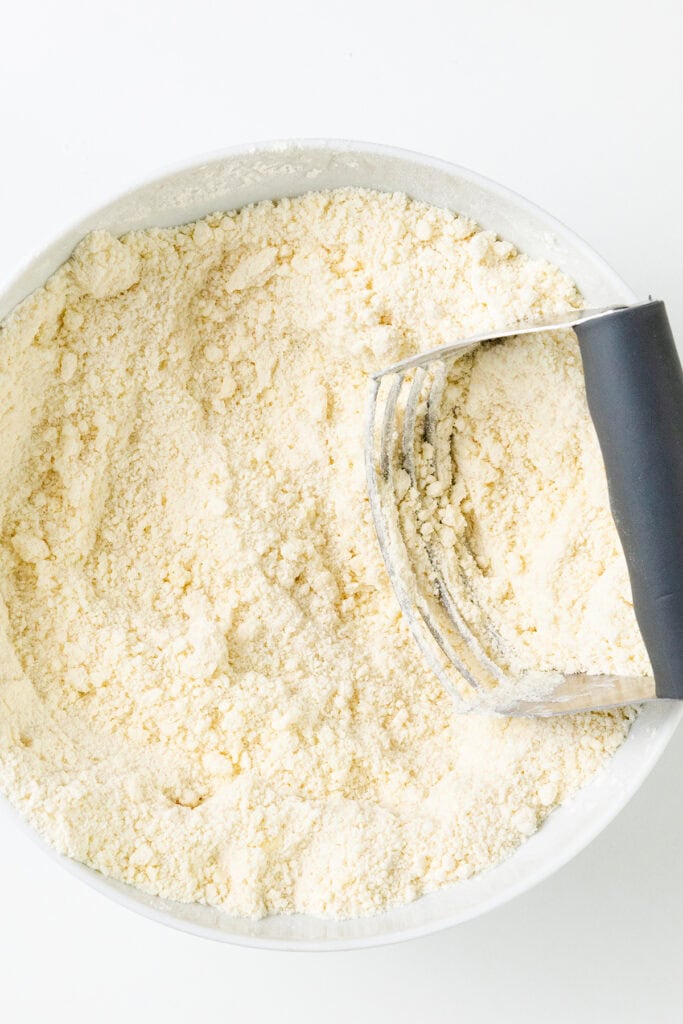
Add 1½ cups (340g) cold, cubed unsalted butter. Use a pastry cutter or your fingers to blend until the mixture resembles coarse crumbs.
Sprinkle 6 tablespoons of ice water over the mixture. Stir and press dough together, using a stiff rubber spatula, until the dough is evenly moistened and very crumbly. Dump the crumbly dough onto a clean surface.
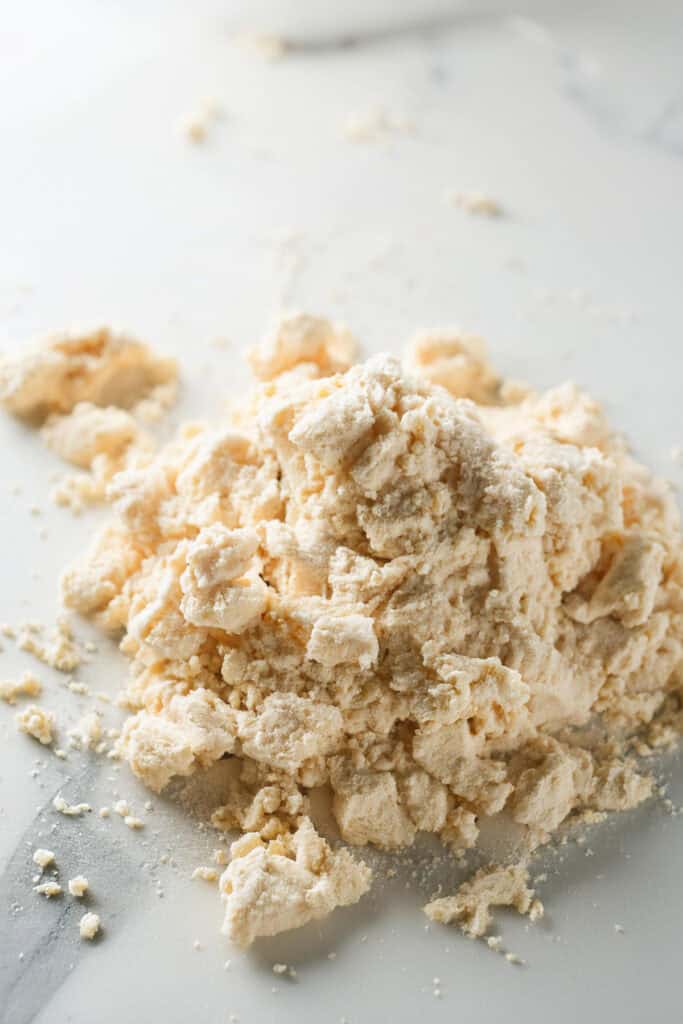
Grab a bit of the mixture and pinch it between your fingers. It should hold its shape. If it falls apart or feels too dry and floury, just add a bit more water, a tablespoon at a time, being careful not to overwork the dough.
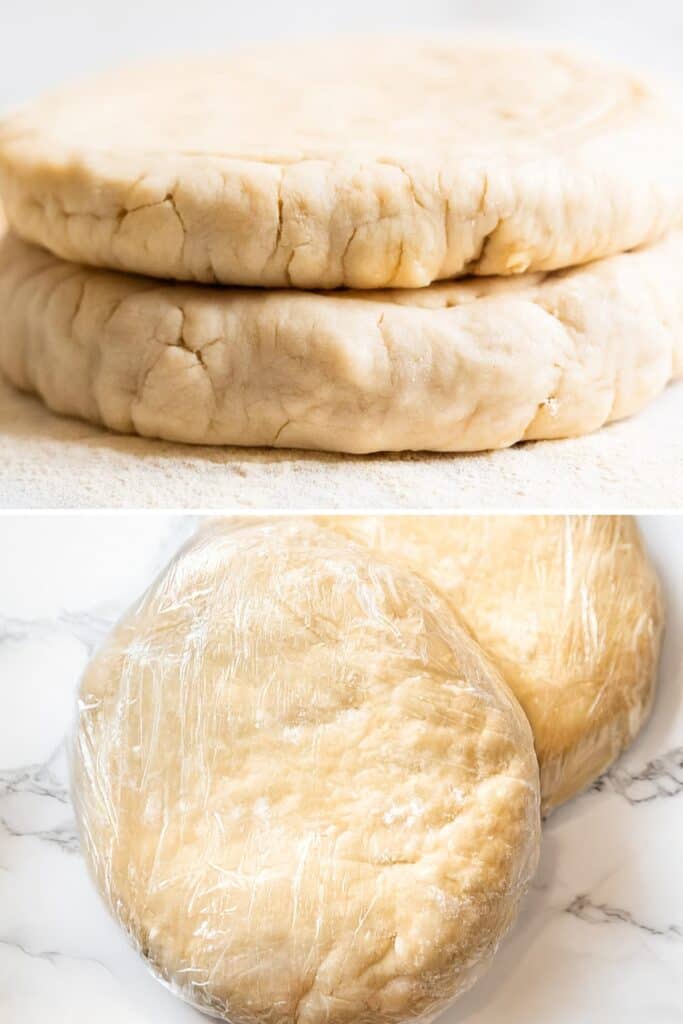
Split it into two piles, making one about 15% bigger than the other. Then, use your hands to knead the dough into a soft, pliable disk quickly. Wrap in plastic wrap, and refrigerate for 1 hour.
Prepare the Apple Filling
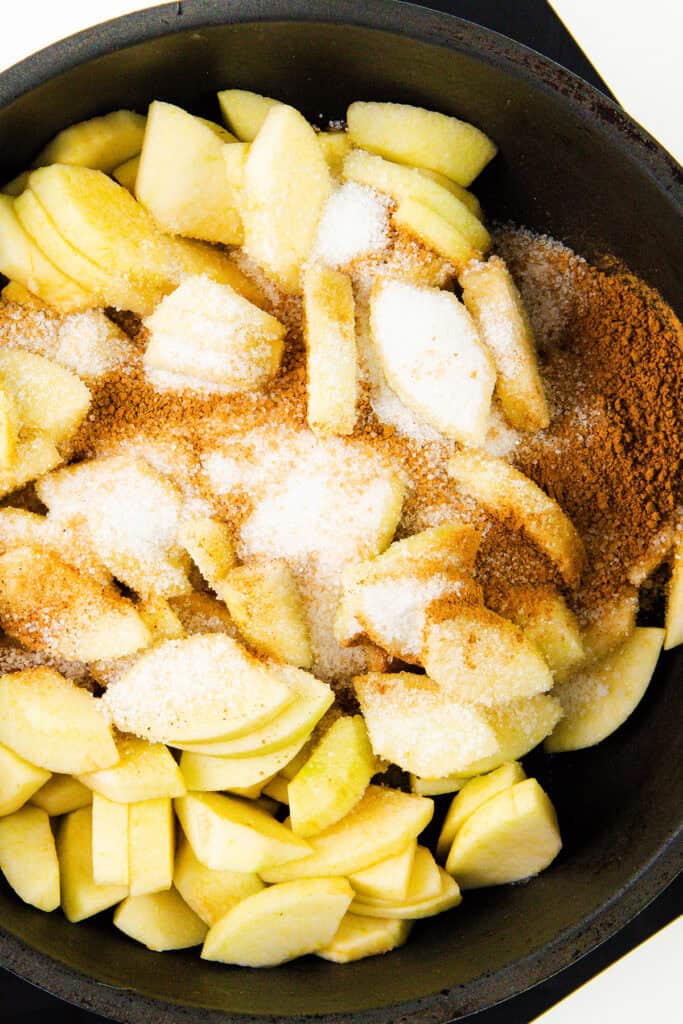
In a saucepan, combine 6 cups (720g) of sliced apples, ⅔ cup (130g) granulated sugar, 2 tablespoons (25g) light brown sugar, 2 teaspoons of cinnamon, and ¼ teaspoon of nutmeg.
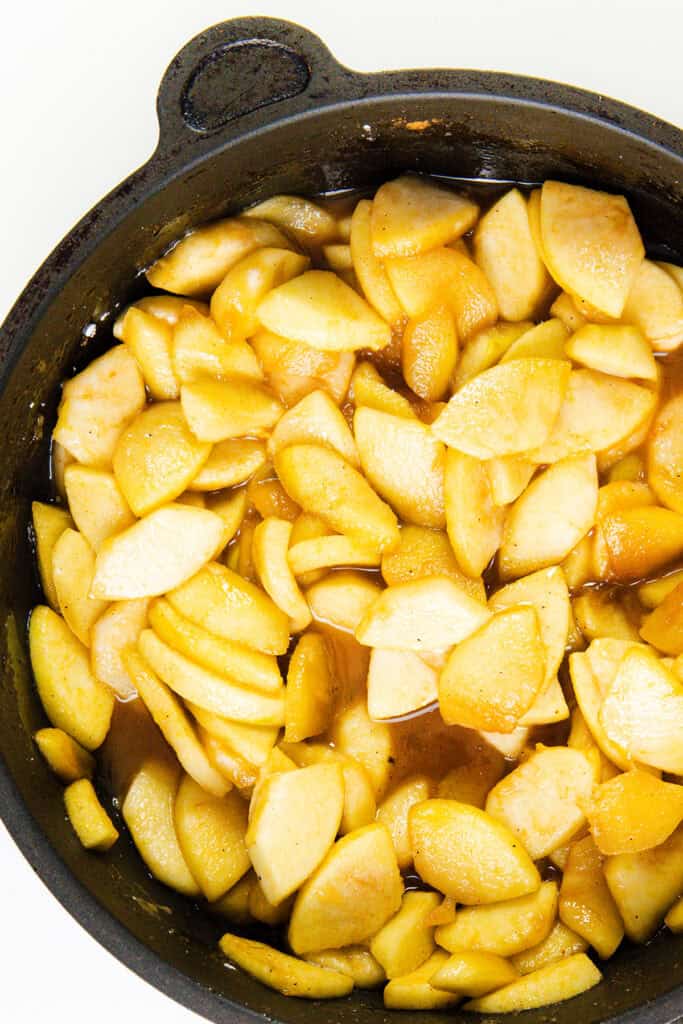
Cook over medium heat, stirring occasionally, for 5 minutes or until the apples soften slightly but retain shape.
Remove from heat and stir in 2 tablespoons (16g) cornstarch and 1 tablespoon (15ml) lemon juice. Set aside to cool.
Prepare the Pear Filling
In a mixing bowl, combine 5 cups (600g) of sliced pears, ½ cup (100g) granulated sugar, 2 tablespoons (25g) light brown sugar, 2 teaspoons cinnamon, ¼ teaspoon nutmeg, 2 tablespoons (16g) cornstarch, and 1 tablespoon (15ml) lemon juice.
Assemble the Pie
Preheat the oven to 500°F (260°C). Preheating a baking sheet or stone helps the bottom crust become crisp.
Roll out the second disc of dough on a lightly floured surface to ⅛-inch thick (3 mm), about 1 inch wider than the pan. Transfer it to a parchment-lined baking sheet, cover with plastic wrap, and refrigerate for 30 minutes.
Scatter about 2 tablespoons of old-fashioned oats across the bottom of the dough-lined pan. This will absorb extra juices from the fruit and help prevent a soggy crust.
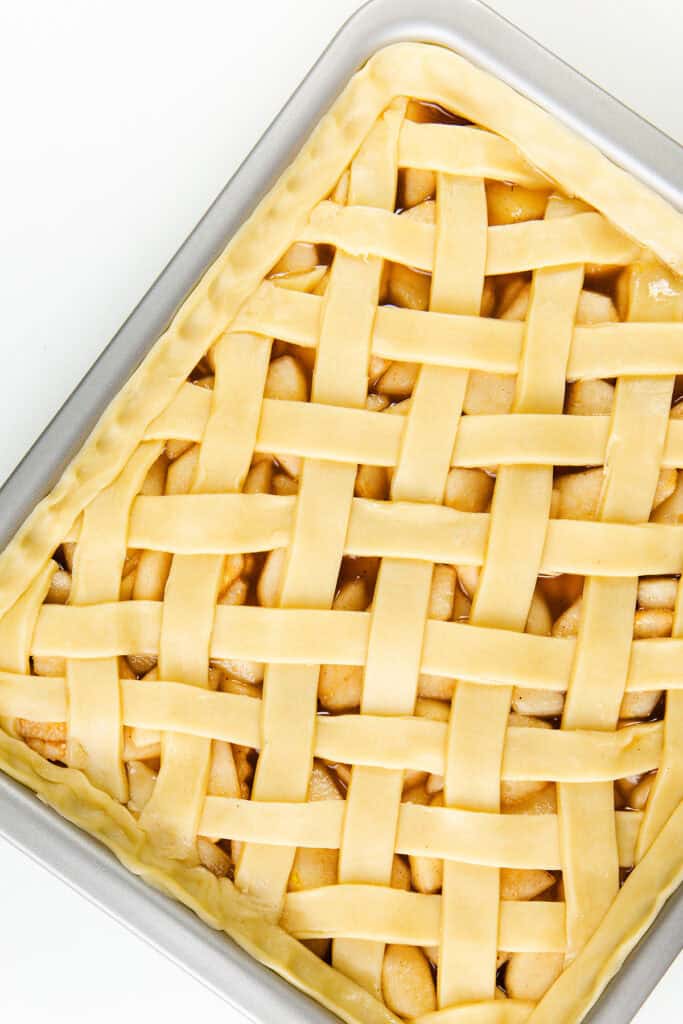
Spoon the apple filling evenly over the bottom crust, creating the first layer of fruit. Next, gently layer the pear filling over the apples, spreading it to cover the entire pan.

Roll out the second disc of dough, then add it using your preferred method.
Seal the edges by pressing the lattice and bottom crust together, trimming any excess dough.
Reduce the oven temperature to 425°F (220°C) and place the pie on the preheated baking sheet or stone. Bake for about 20 minutes, until the crust is light golden brown.
Lower the oven temperature to 375°F (190°C). Cover the edges of the pie with foil to prevent over-browning, and carefully rotate the baking sheet. Continue baking for another 30–35 minutes, until the filling is bubbling and the crust is deep golden brown.
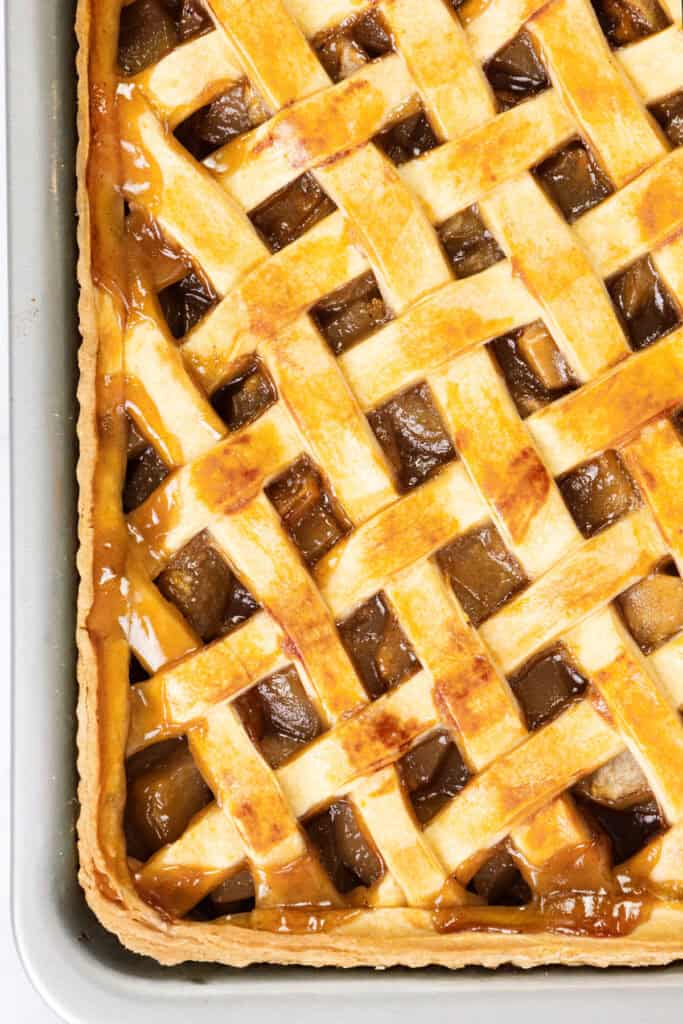
Let the pie cool for at least 30 minutes before serving.
Recipe Tips
Keep the Butter and Dough Cold: Cold butter is essential for a flaky crust. If the butter gets too warm, the crust can become dense. Try to handle the dough as little as possible and keep it in the refrigerator if you need to pause.
Use Iced Vodka or Water Carefully: When adding the liquid, remember to add only the iced vodka or water—not the ice cubes. Cold liquid keeps the butter from melting and makes the dough easier to roll out. The vodka adds moisture without developing gluten, which leads to a softer crust.
Pre-cook the Apple Filling: Apples can take longer to cook than pears, so lightly cooking them before baking helps both fruits reach the perfect texture at the same time.
Absorb Extra Juices with Oats: Sprinkle a layer of old-fashioned oats on the bottom crust before adding the filling. The oats will soak up extra juice from the fruit as it bakes, keeping the crust from getting soggy without affecting the flavor.
Rest the Dough Before Rolling: After you chill the dough, let it rest for a few minutes at room temperature before rolling it out. This reduces cracking and makes it easier to shape without tearing.
Prevent Over-Browning with Foil: If you notice the crust edges browning too quickly, cover them with foil partway through baking. This will protect the edges while the filling finishes cooking.
Look for Bubbling Filling: A bubbling filling is a good sign that the cornstarch has fully activated and thickened the juices. This helps ensure that your pie slices will hold their shape instead of being too runny.
Cool Completely Before Slicing: Allowing the pie to cool for at least 2 to 3 hours helps the filling set and makes it easier to slice cleanly. It’s tempting to cut in while it’s warm, but a little patience goes a long way to a perfectly presented slice!
Use a Baking Stone or Preheated Baking Sheet: Placing the pie on a preheated baking sheet (or baking stone if you have one) helps the bottom crust bake evenly and become crisp.
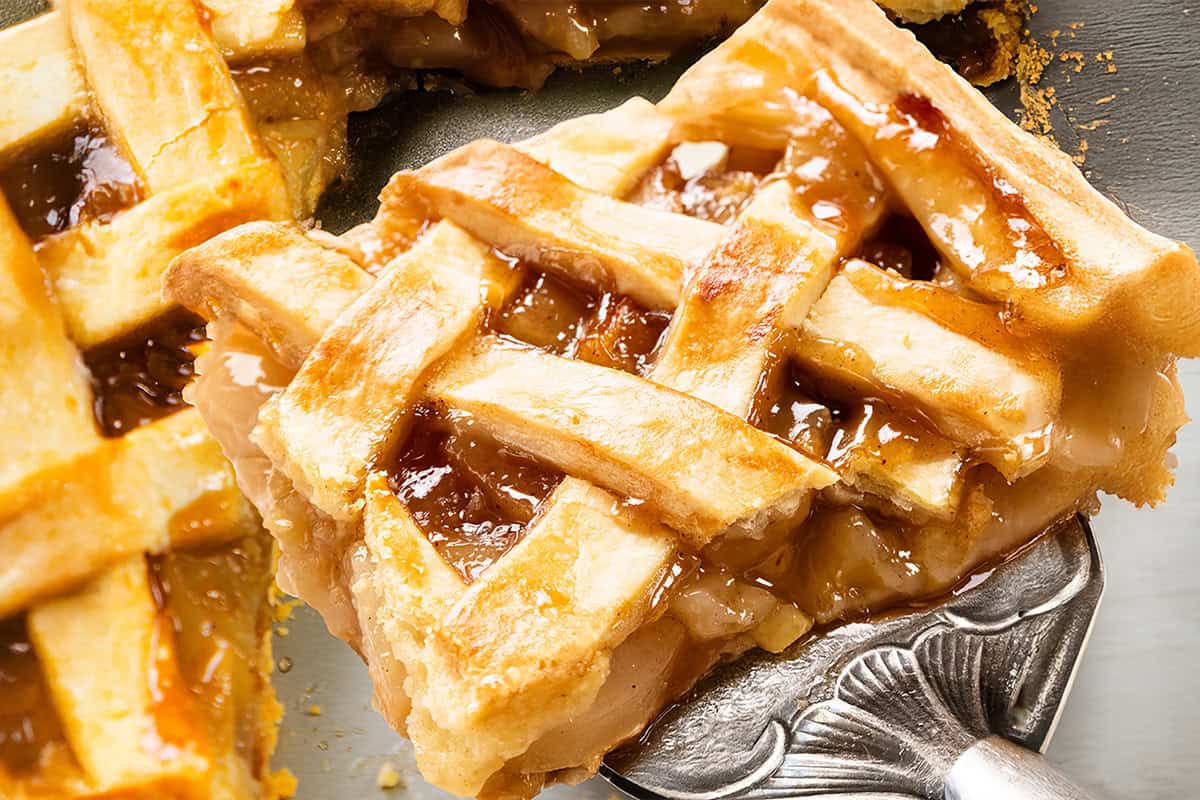
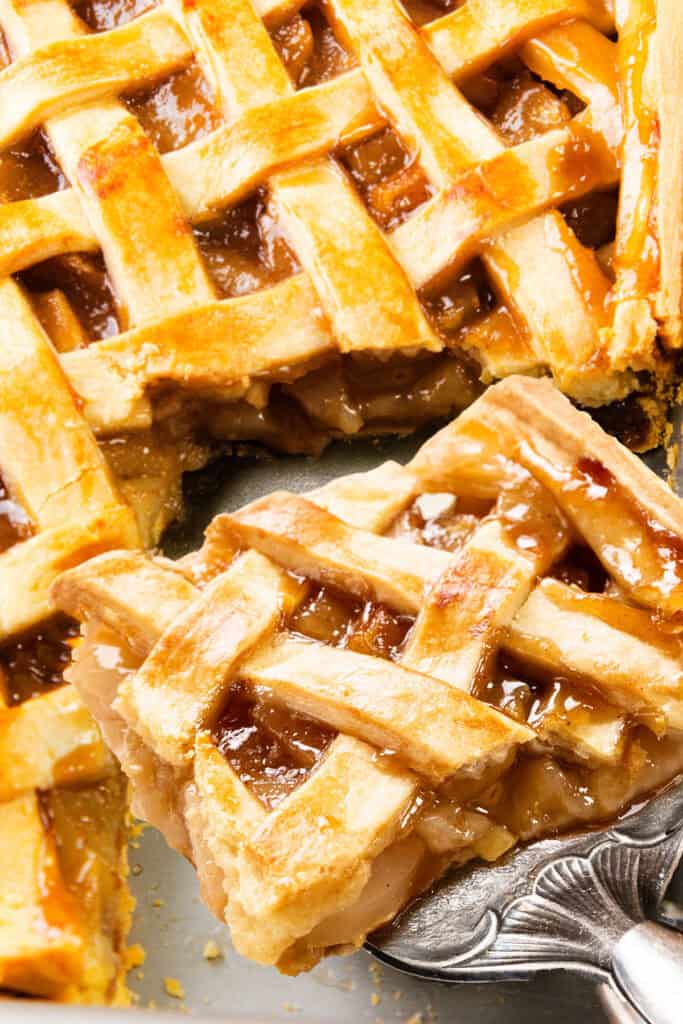
Try a Lattice Top if Desired: For a beautiful finish, consider using a lattice pattern on the top crust. This allows steam to escape while also giving the pie an attractive, traditional look.
Storage & Freezing Instructions ❄
Storage: Keep the pie in an airtight container at room temperature for up to 2 days, or refrigerate for up to 5 days.
Freezing: To freeze, wrap the baked, cooled pie tightly in plastic wrap and then in aluminum foil. Freeze for up to 3 months. Thaw at room temperature before reheating.
Rate This Recipe

Recipe
Apple and Pear Slab Pie
Ingredients
- 5 cups all-purpose flour
- 3 tablespoons vegetable oil
- 1½ cups unsalted butter (cold and cubed)
- 1 teaspoon salt
- ½ cup 118 ml iced vodka or iced water (just the liquid, no ice cubes)
For the Apple Filling:
- 6 medium apples ((about 6 cups/720g), peeled and sliced)
- ⅔ cup granulated sugar
- 2 tablespoons light brown sugar
- 2 teaspoons cinnamon
- ¼ teaspoon nutmeg
- 2 tablespoons cornstarch
- 1 tablespoon lemon juice
For the Pear Filling:
- 6 medium pears (peeled and sliced)
- ½ cup granulated sugar
- 2 tablespoons light brown sugar
- 2 teaspoons cinnamon
- ¼ teaspoon nutmeg
- 2 tablespoons cornstarch
- 1 tablespoon lemon juice
Other Ingredients:
- 2 tablespoons old-fashioned oats (optional, for absorbing juices)
- 1 egg white (beaten (for brushing))
Instructions
Make the Crust
- In a large mixing bowl, combine 5 cups (600g) all-purpose flour and 1 teaspoon salt. Drizzle in 3 tablespoons vegetable oil, tossing to lightly coat the flour.
- Add 1½ cups (340g) cold, cubed unsalted butter. Using a pastry cutter or your fingers, cut the butter into the flour until the mixture resembles coarse crumbs.
- Gradually add ½ cup (118 ml) iced vodka or iced water, stirring until the dough just holds together. (Only use the chilled liquid, not the ice cubes.)
- Divide the dough into two portions, one slightly larger than the other. Shape each portion into a disc, wrap them in plastic wrap, and refrigerate for at least 1 hour.
Prepare the Apple Filling
- In a medium saucepan, combine 6 cups (720g) of sliced apples, ⅔ cup (130g) granulated sugar, 2 tablespoons (25g) light brown sugar, 2 teaspoons cinnamon, and ¼ teaspoon nutmeg.
- Cook over medium heat, stirring occasionally, for about 5 minutes, or until the apples begin to soften but still hold their shape.
- Remove from heat and stir in 2 tablespoons (16g) cornstarch and 1 tablespoon (15 ml) lemon juice. Set aside.
Prepare the Pear Filling
- In a large bowl, combine 5 cups (600g) of sliced pears, ½ cup (100g) granulated sugar, 2 tablespoons (25g) light brown sugar, 2 teaspoons cinnamon, ¼ teaspoon nutmeg, 2 tablespoons (16g) cornstarch, and 1 tablespoon (15 ml) lemon juice. Mix gently until all the pears are coated.
Roll Out the Crusts
- On a lightly floured surface, roll out the larger portion of dough to about ⅛-inch thickness, making it about 1 inch wider than a 9×13-inch baking pan.
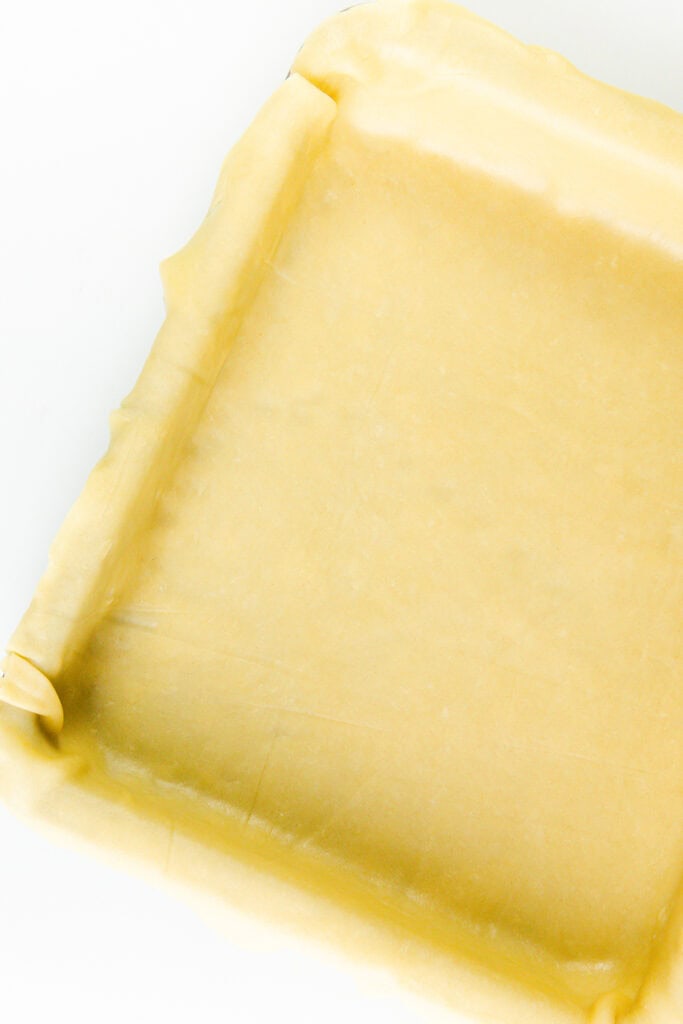
- Loosely roll the dough around a rolling pin and unroll it over the pan, letting the excess dough hang over the edges. Gently press the dough into the bottom and corners of the pan, and allow the overhang to remain. Wrap the dough-lined pan in plastic wrap and refrigerate for 30 minutes.
- Roll out the second portion of dough to the same thickness, about 1 inch wider than the pan. Transfer it to a parchment-lined baking sheet, cover with plastic wrap, and refrigerate for 30 minutes.
Preheat the Oven
- Adjust the oven rack to the lowest position. If available, place a baking stone on the rack with a rimmed baking sheet on top. (If you don’t have a baking stone, use just the baking sheet.) Preheat the oven to 500°F (260°C).
Assemble the Pie
- Scatter 2 tablespoons old-fashioned oats over the bottom of the dough-lined pan to help absorb excess juices.
- Spread the apple filling evenly in the pan, then layer the pear filling over the apples.
Add the Top Crust
- Loosely roll the top crust dough around the rolling pin and gently unroll it over the filling. Trim the overhanging dough to about ½ inch beyond the edge of the pan.
- Pinch the edges of the top and bottom crusts together, then tuck the overhang under itself so the folded edge aligns with the edge of the pan.
- Crimp the edges to seal the crust. Cut four 2-inch slits in the top crust to allow steam to escape while baking. Brush the entire surface with the beaten egg white.
Bake the Pie
- Lower the oven temperature to 425°F (220°C) and bake the pie for about 20 minutes, or until the crust is light golden brown.
- Reduce the oven temperature again to 375°F (190°C). Cover the edges of the pie with foil to prevent over-browning, and rotate the baking sheet. Continue baking for an additional 30-35 minutes, or until the filling is bubbly and the crust is deep golden brown.
Cool the Pie
- Transfer the pie to a wire rack and let it cool to room temperature, about 1 hour, to allow the filling to set before slicing and serving.


Leave a Reply